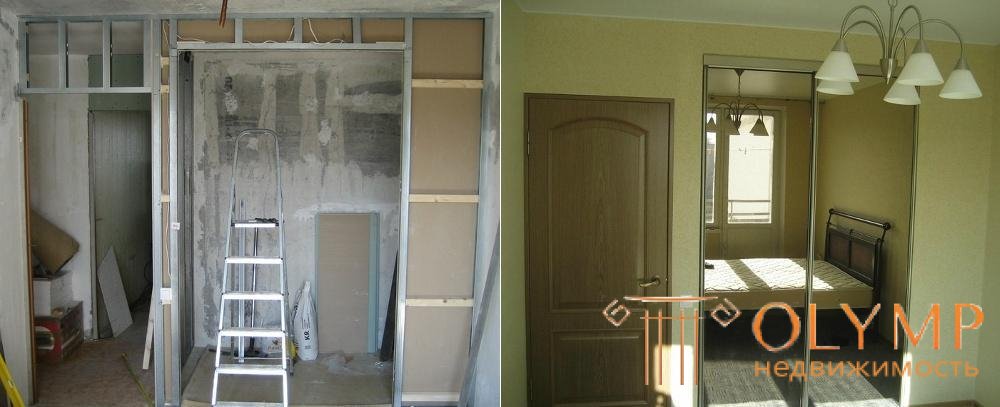
A dressing room is a specially designated place in the room where clothes will be stored. Usually dressing rooms are made in a bedroom where people most often change clothes, but it can be built in another convenient place. Wardrobe from gypsum cardboard is an economy not only of space, but also money.
When there is too much clothing and it is literally scattered everywhere, even a small dressing room of 3-4 square meters saves the day. Using drywall to create it, you can significantly save on building materials.
Content:
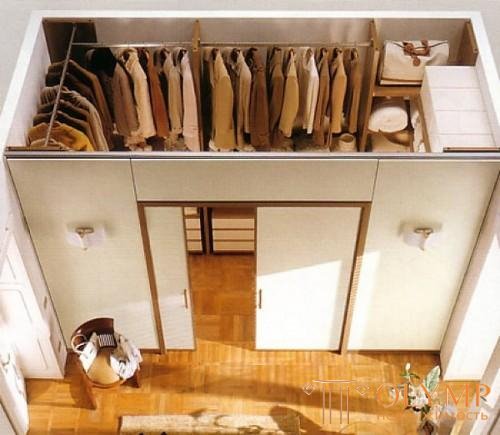
Wardrobe of drywall easier to do without an open top
Before you dive into the work, you need to understand what should be the dressing room. Everything thinks in order to organize storage of clothes with shoes, as well as to have quick access to them. It is clear that you need to save space as much as possible. Immediately, we note that a dressing room is being made with hands by itself from drywall in large rooms. It makes no sense to create it in a 2 by 3 meter room.
Perhaps you don’t need to do anything at all, because storerooms are often reequipped to store clothes in them. But if there is no storage room, you will have to create everything yourself.
It makes no sense to make a dressing room less than 1x1.5 meters. If it is even smaller, then no layout will help to store things in it normally. The more things, the more space. If you need to store a lot of dresses, then the place under the dressing room should correspond to this volume. The fact is that long clothes take height, which means there will be less shelves and, accordingly, less space for other clothes or shoes.
Since there is no convenient storage room, it is necessary to find another suitable place. A dressing room made of plasterboard in the bedroom is the obvious option. Let's analyze all possible places.
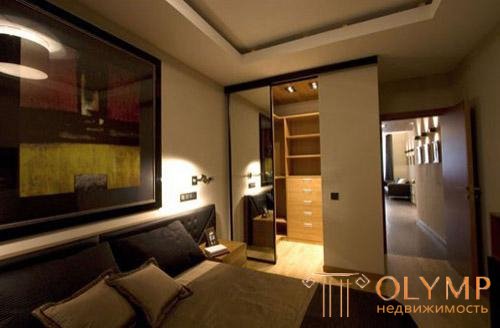
If properly decorated, the dressing room in the bedroom will be invisible
Before starting work, you need to know how much material is required for work. To do this, you need to understand the layout. Only having solved this question, it will be clear how many sheets of drywall, self-tapping screws, profile and other things are needed.
If your planning does not limit anything, then it may make sense to order a huge closet or hire workers to do everything. If the financial issue is acute, then every detail should be thought out. The wardrobe room with the hands from gypsum cardboard will help to save if to think economically.
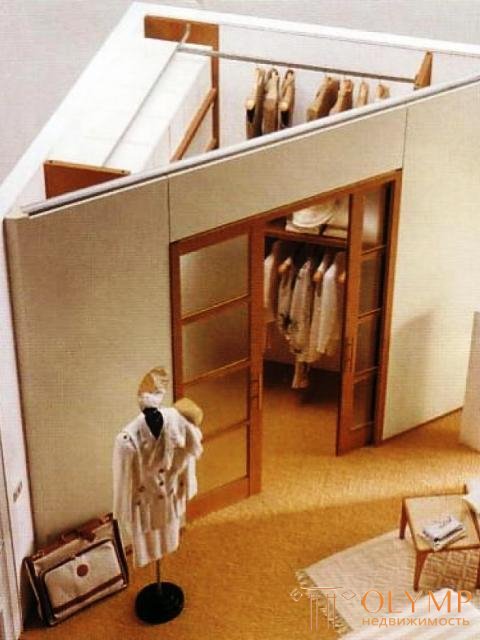
Corner wardrobe is an economical option
First of all, you need to understand how much free space there is. If it is possible to allocate 6-8 square meters, then this is ideal. If not, you have to get out. After determining the footage you need to decide how many compartments will be allocated under the shelves, and how many under the clothes hangers. Usually make 1-2 shelves below, then on top a place for hangers with clothes, and above 1-2 more shelves for other things. And so it does several sections.
A characteristic feature of the dressing room is the presence of doors. They need to be provided so that it is convenient to enter. Poorly designed doors reduce the usable floor space.
Summing up we can say that it is necessary to know in advance the wardrobe area, as well as its layout. Ideally, draw a sketch where everything will be provided. This sketch is required in the work to create a frame of metal profiles and sheathe it with sheets of drywall. Therefore, you need to know where the door will be created for the door, where there will be fastenings under the bar, and where the shelves will be attached.
A dressing room made of plasterboard is built much faster if there is a project or sketch. In the project it is necessary to designate as detailed as possible the entire dressing room as a whole, and each section separately. Especially carefully it is necessary to approach to drawing of designs with a slanted corner. What a dressing room layout might look like:
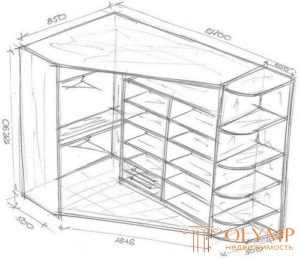

The standard depth of the shelves is 50 cm (no longer required), and the distance between them does not exceed 40 cm. The parameters of the place for a bar with clothes depend on the type of clothing. Perhaps you will be there alone shirts and jackets, and perhaps you need to provide a place for evening gowns.
In the project, do not forget about the thickness of the walls, but it often turns out that the dimensions are smaller than planned. The thickness of the walls consists of the width of the profile used and the thickness of the plasterboard with which it is sheathed.
Often the dressing room of drywall is left without doors. At least they are not taken into account in the project. The width of the door should be 80 cm (in extreme cases - 60 cm). With them, many get real trouble. Doors made of plasterboard or other material are always a problem dressing room due to the complexity of their installation. Someone uses a system of sliding doors, someone chooses a hinged design. Some even refuse to door to fool less. Everyone makes this choice independently.
When all the preliminary work has been completed and there is an understanding of how much is needed, then it’s time to proceed to the purchase The work will require the following consumables:
Since the plasterboard dressing room will need to be finished, primer and putty will also be required. In addition, the following working tools will be needed:
Some advise for some reason to warm the dressing room, but if it is in the bedroom, then this makes no sense. Even in other heated premises, insulation will only be an additional item of expenditure, which will not bring any benefit. An important point is the lighting. It is not necessary for small squares, but for a large dressing room light is needed. Therefore, you should purchase the necessary wires and lighting devices.
This is a more or less standard list of necessities, but it can be expanded. For example, hinges, door handles, a system for sliding doors, etc. may be required.
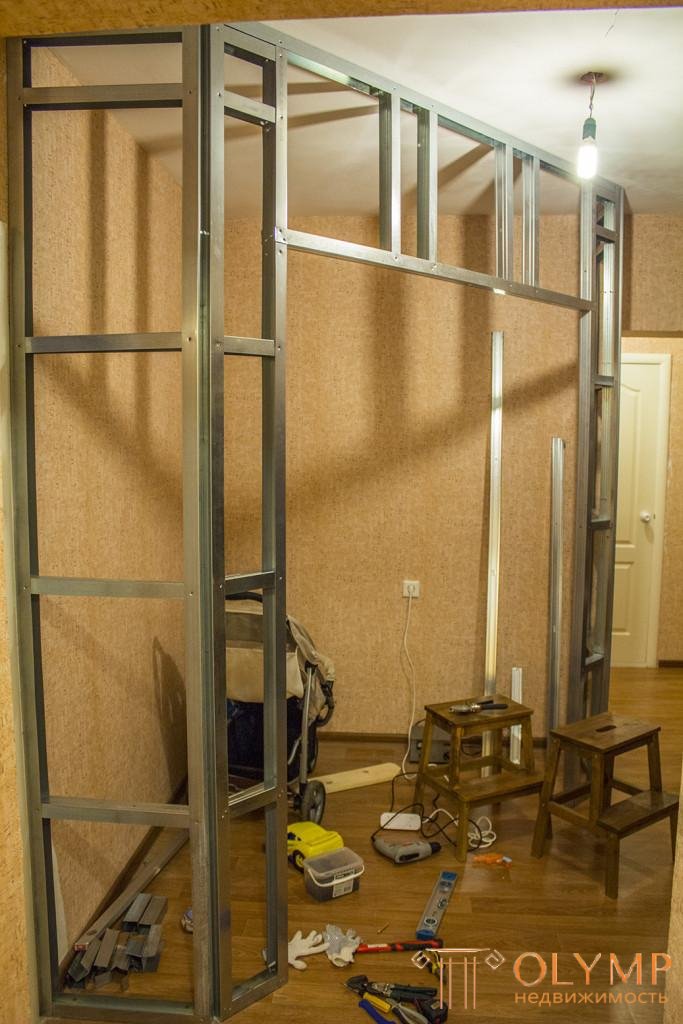
It looks like a simple frame for a dressing room.
Now it's time to talk about how to make a closet of drywall with your own hands. You need to transfer the drawing to the wall, floor and ceiling so that you can see where to fasten the profiles. The frame will be assembled from the metal profile, so you need to properly mark everything. Since the dimensions of the structure are small, you can cope with a level, a tape measure and a pencil. Profile is used instead of a ruler.
On the floor wall and ceiling are marked places where the profile will be mounted in the wall. A step of 40-60 cm is enough. In these places, the surface is drilled under the dowels (the dowels themselves, 6x40 mm in size, will fit perfectly). The profile is applied to the surface and holes are also drilled in it, and then it is fastened with driving screws. This is how the profile is fastened in all places where it touches the wall, ceiling or floor. Someone uses for this purpose rack profile, and the rest is assembled design of the guides. Others prefer to do all the work with the guide profile. None of the options is wrong.
Before mounting the profiles to the wall, ceiling and floor, it is desirable to lay the sealing tape in the places of fastening. It is used for additional sound insulation and reduces the level of vibrations of the whole structure. When things are put on the shelf, the doors are closed or the coat is hung, the noise will be much less.
When collecting the box, it is important to consider the place under the door so that the profile does not go along the floor. Since the wardrobe is made of drywall, it may require additional reinforcement of the frame in the doorway. Also, the entire frame is reinforced around the perimeter with the help of jumpers that are inserted into the assembled box with a step of 60 cm. You need to make sure that one of the racks was held in the place of attachment of the rod for trempely.
If the dressing room already has an outlet, then great. If not, then you need to think about how to bring it through the profiles. You should also at this stage make the wiring, if the dressing room will be several sources of light. If you make more and shelves of plasterboard, it will be a very time-consuming dressing room. Yes, and places such shelves take a lot. But the built-in partitions to divide the dressing room into sections, can be useful. They are made the same way as the foundation frame.
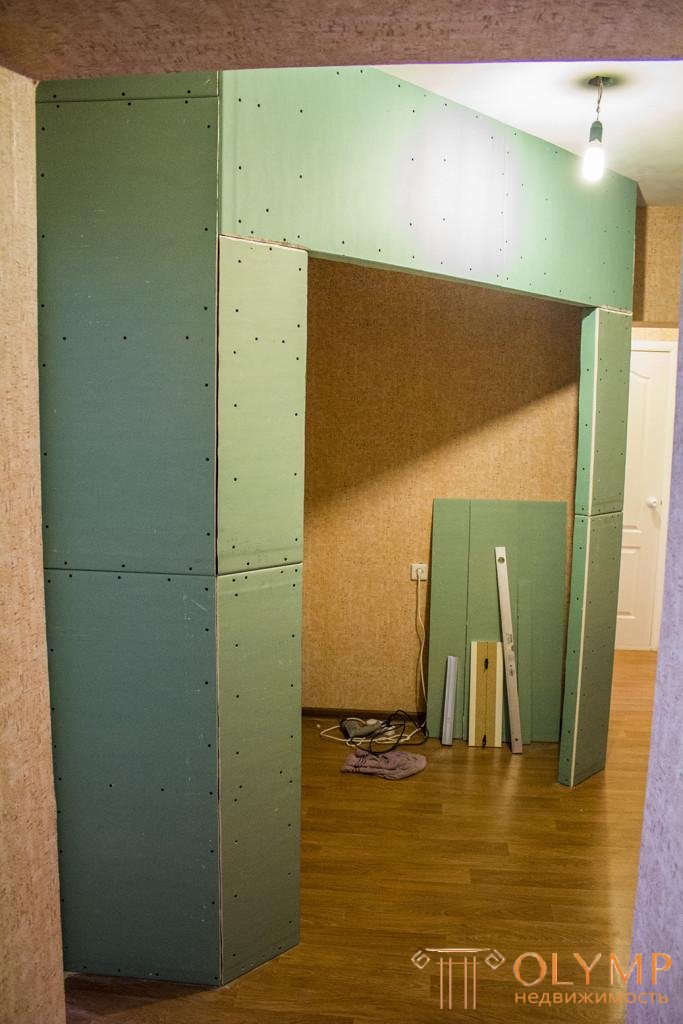
Drywall fastened with screws with a pitch of 15-20 cm
Sheathe the entire structure with drywall start from the inside. Wherever possible, whole sheets are used, and elsewhere they are trimmed. It is important that the edges of the sheets fall on the profile, otherwise their fixation will be problematic. Self-tapping screws 25 mm long (maximum 35 mm) are used for fastening.
It is necessary to fasten drywall in all places where it comes into contact with the profile. The caps of the screws should not stick out; they should be slightly deepened so that the surface remains smooth.
When the dressing room of plasterboard is sheathed from the inside, then you need to provide a place for sockets, fixtures or wiring. Depends on the project. Between the sheets of drywall (inside and outside the dressing room) a cavity is formed, in which it is convenient to make the wiring for future lighting. Someone conducts additional insulation and noise insulation, but for the dressing room in the bedroom is clearly a waste of time and money.
When all sheets of drywall are fixed, you need to putty all joints and screw caps. The joints are additionally reinforced with a reinforcing tape so that they do not cause cracks in the future. It is also necessary to putty all corners. Cut seams need to be primed before putty so that the solution does not fall off. After puttying, the surface of the dressing room will become uniform and ready for finishing.

Dressing before and after finishing
Further work depends on the type of finishing coating that is chosen for the dressing room. Its walls can be simply painted or sealed with wallpaper. Someone sheathes additional decorative panels or plywood. Someone also likes wrapping the walls with mirrors.
In fact, the creation of a dressing room made of plasterboard is completed. However, there are a few more points worth paying attention to.
In particular, we are talking about the rod for trempely. The maximum load will go to it in the dressing room, the poet should make a high-quality fastening. Best of all, when the bar will be attached not to one drywall, but also to the profile that is part of the frame. Then the entire load will go not to the GCR, but to the profile, which is much more reliable.
Also remains an open question about the door. The easiest way is to purchase sliding doors with a special system so as not to do everything yourself. This option will be optimal in terms of saving space. It is worth thinking about ventilation. Not very good when everything is clogged.
As a topcoat it is recommended to use wallpaper in tune with the room. For their pasting requires minimal preparation of drywall. Yes, and the dressing room of drywall in this case will merge with the room.
As for the various shelves, they can be made of various materials. It may be drywall shelves, but you need to be able to do them. If there are too many shelves, the work will be protracted. How to make shelves in the dressing room can be found in the video.
Что бы оставить комментарий войдите
Комментарии (0)