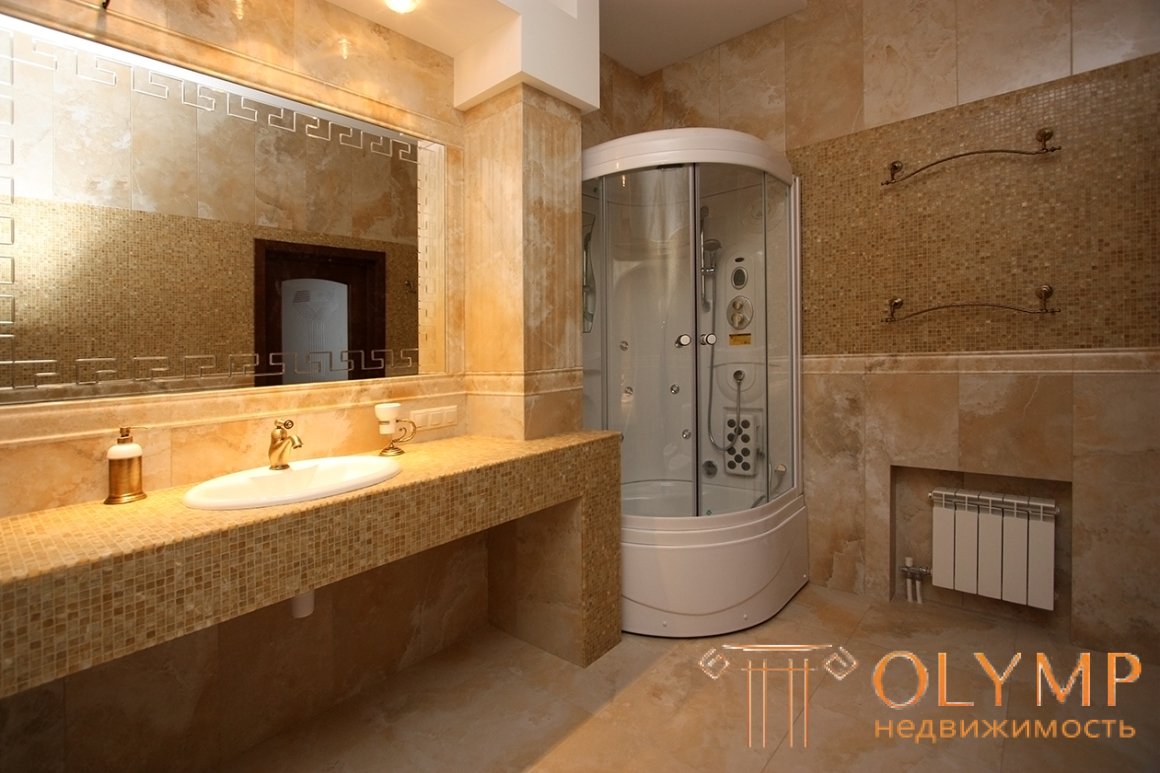
During the renovation of a small-sized bathroom, you do not want to lose its useful area. The plasterboard tabletop in the bathroom will help not only to maximize the use of the available space, but also save on the purchase of a stand under the sink. The same design can be done in the kitchen, saving money on the purchase of countertops from other materials. The finished construction is obligatory revetted with tiles, so that no one would guess that the GCR was used to create it.
Content:
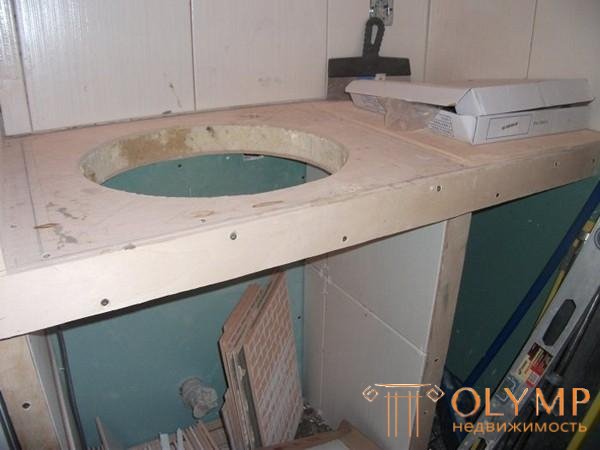
Typical view of a sink countertop
Although the tabletop made of plasterboard in the bathroom is a small construction, but still it will need to acquire all the standard materials and tools for working with plasterboard. You will need the following materials:
The list of tools is also standard. It includes a drill, screwdriver, jigsaw, metal scissors, level, tape measure, spatula and brush. It is clear that this list is not complete and can be supplemented as needed.
Tools and fasteners for all cases are the same, but with the place everyone must decide for himself. If the hoses for the faucets have already been removed, then the tabletop of the plasterboard under the sink is done at this place. Without permission, you can choose a place for the tabletop only if you change the position of the washstand in the bathroom. But for this you need to do your wiring hoses.
The tabletop should be installed at a height of 70-90 cm from the floor. In this case it will be most convenient to use the sink. Also, the sink should retreat 10 cm from the wall, so it’s worth considering these dimensions when selecting a place and calculating the dimensions of the plasterboard table top.
You need to buy a sink to know what its size. Then you can already think where and at what distance from the floor and walls it can be installed. This will help determine the size of the tabletop and frame.
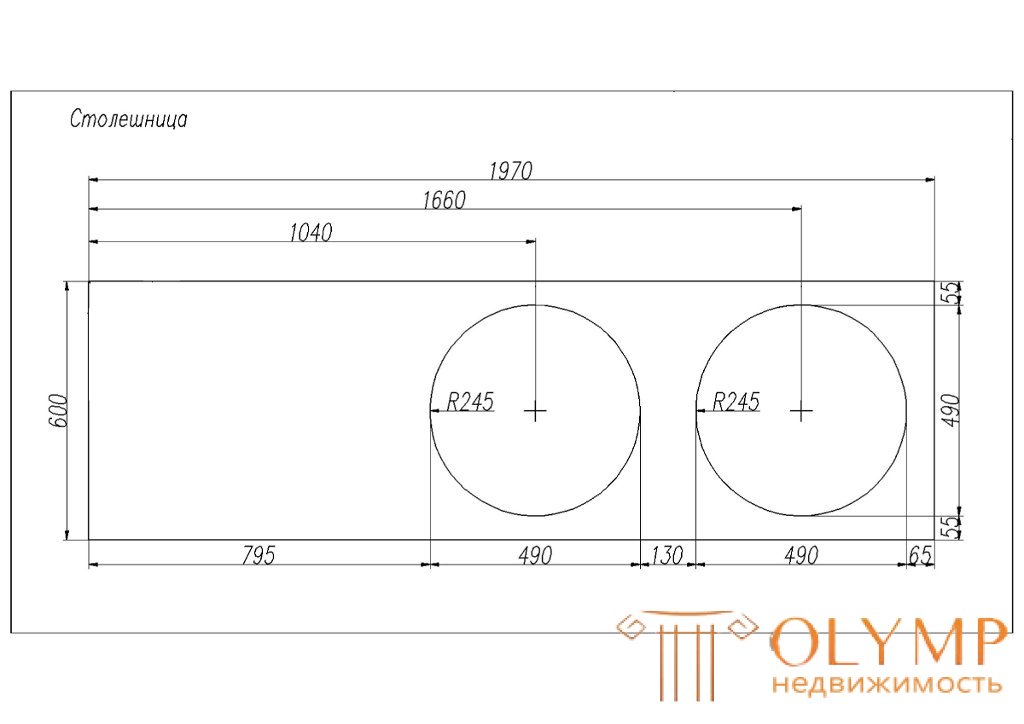
It would not be superfluous to make a drawing of a future construction
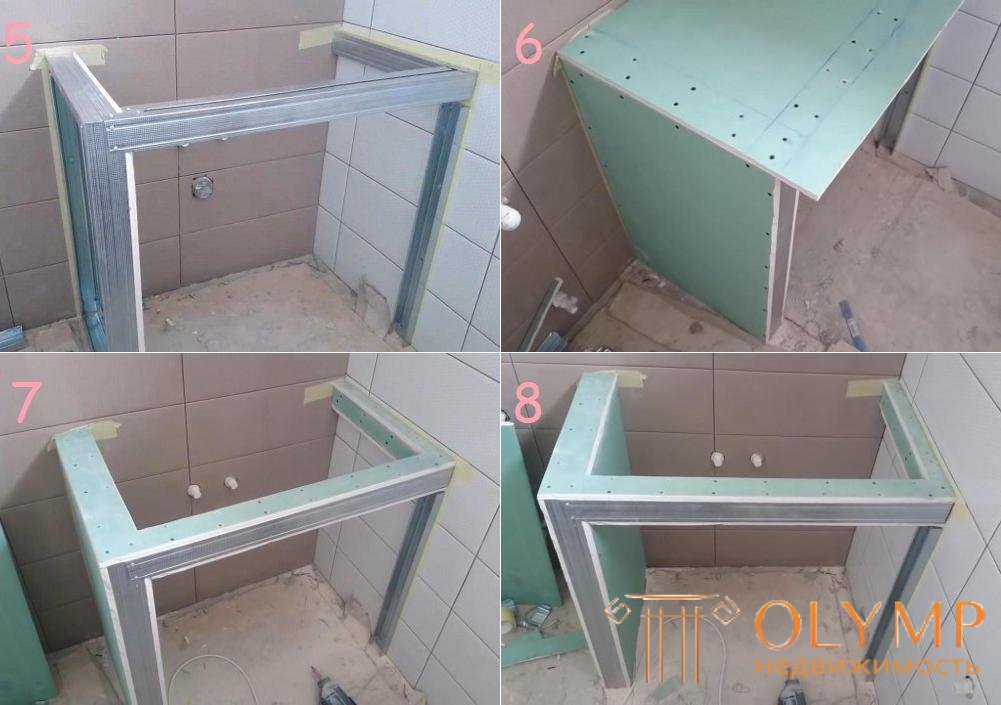
When making a plasterboard tabletop in the bathroom with your own hands it is very important to take care of its reliability. For this you need a strong frame. Theoretically, you can make a tabletop, hanging in the air (based only on the wall). But because of the large weight of the sink, it is better to abandon this idea, creating a frame with a support on the floor.
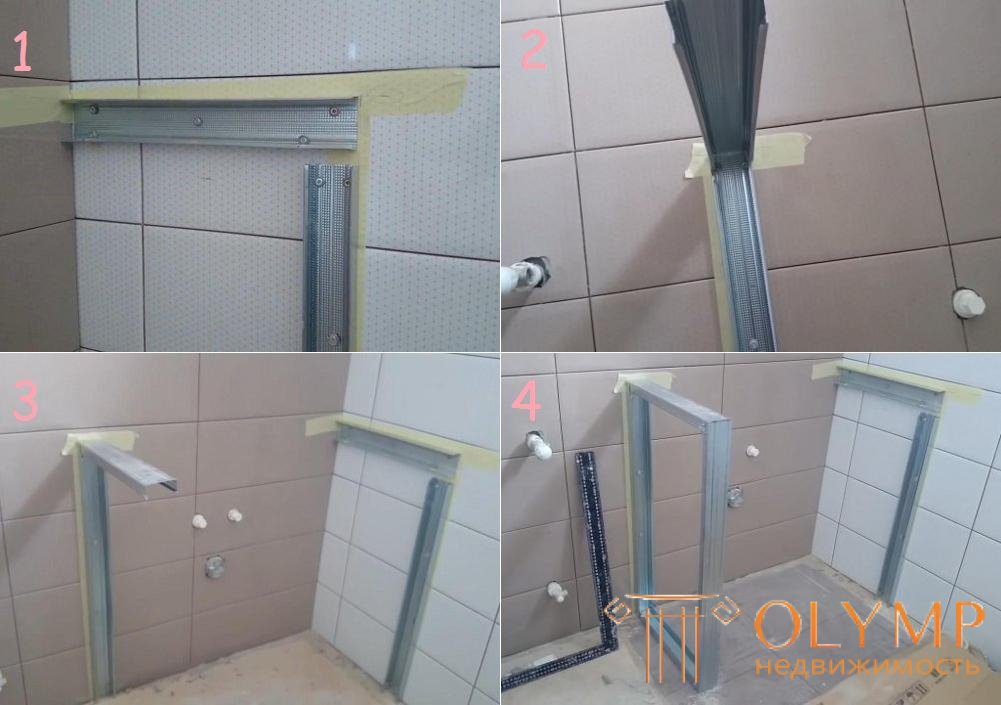
The two profiles joined by the box are strong enough to be the backbone of the frame.
This method of creating a frame is also suitable for those who are interested in how to make the table in a bathtub of plasterboard.
Only now it is necessary to carry out measurements and cut the GCR. Some advise immediately cut a hole under the sink, but it is very inconvenient to do on the weight, so even with two sheets of drywall. Moreover, they have different sizes (one is sewn on top of the frame, and the second on the bottom).
Making the countertop sink a lot easier
A sheet of drywall is fastened to the upper part of the frame, which will be the front part of the tabletop. Then it draws a contour under the sink. To do this, you can attach the sink itself or use a special layout that usually comes with it in the kit. Do not forget about the jumpers, because they serve as an additional support for the sink.
When the upper tabletop of plasterboard in the bathroom is bolted, then fasten the bottom sheet (its size will be slightly smaller than that of the top because of the profiles). Now, using the existing contours, you can cut a hole under the sink with a jigsaw. And it is cut in two sheets at once.
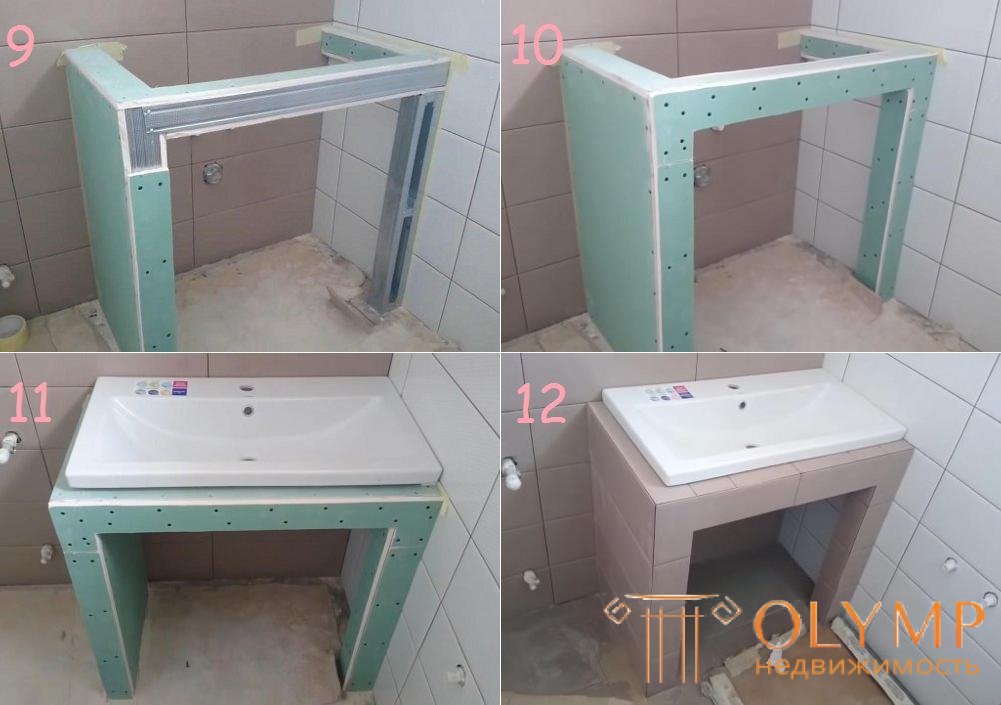
The sink is installed only after the completion of all works on finishing
Further, all parts of the frame are sheathed with drywall so that the profiles are not visible at all. Do not forget to grab the GCR not only around the perimeter, but also in those places where jumpers are installed. Externally, the finished design will be very similar to a plasterboard table.
Surely it became clear that one can not be limited to one table top. Yes, and by its design, it is very similar to the cabinet. The cabinet is made of drywall under the sink with his own hands on the same principle as the tabletop. It will only be necessary to provide several shelves in the design, if there is a need for them.
Finishing plays a very important role due to the fact that the tabletop will constantly be in contact with water. Moisture resistant plasterboard alone will not be enough. The first step is to cover the caps of the screws with enamel so that they do not rust. There are a lot of controversies on this subject, because black screws should not rust, but practice shows that in this case there will be no additional protection.
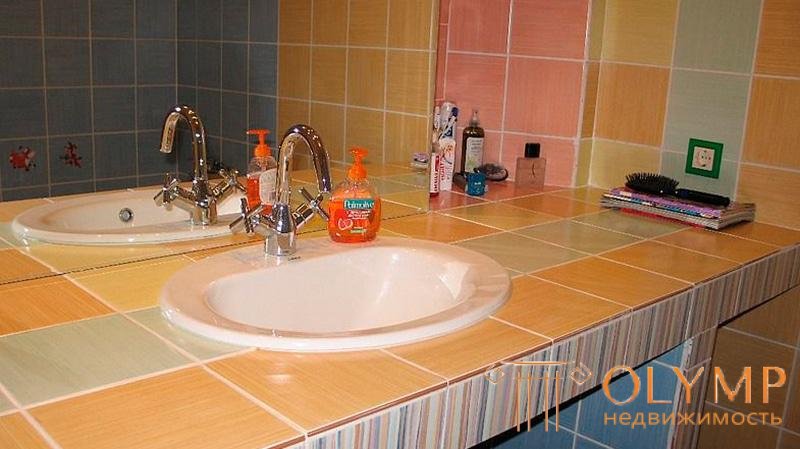
Plasterboard countertop in a bathroom covered with tiles
All joints GKL and self-tapping caps putty. It is necessary to pick up moisture resistant putty. Also at the joints will need to lay a special reinforcing mesh to make the whole structure more durable. You can use tile adhesive instead of putty. After that, you need to go through the silicone sealant on all the joints so that moisture does not penetrate into them. This is especially true if the tabletop is made of plasterboard in the kitchen, where they constantly wash dishes and splashes fly in all directions.
If the tabletop has rounded edges, then for their facing you need to use mosaic tiles that will go around all the contours.
In the absolute majority of cases, the finishing lining is carried out with the help of ceramic or mosaic tiles. With ceramic tiles there are usually a lot of problems, because the tabletop is not so big, so the tile will have to be cut. But the mosaic tile is well suited for facing small areas.
The entire surface is primed before laying the tile. After the primer dries, tile adhesive is applied with a notched trowel, and then the tile itself is laid out. Then you will need to wipe the seams. For this purpose, a special trowel mixture is used. You can find out how much such a mixture you need depending on the size of the tile and the width of the seam from the table.

Trowel mix consumption table for ceramic tiles
There is another question. How to hang a sink on drywall? If everything was done as described in the article, then it will not have to hang anywhere, because you can insert it directly into the tabletop. To do this, the shell is inserted into the hole made earlier and planted on silicone glue. So it will not stagger, and water will not leak through the cracks.
Что бы оставить комментарий войдите
Комментарии (0)