The multi-level plasterboard ceiling with lighting strikes with its beauty. It seems that it is impossible to reproduce this splendor on your own. We guess that you can make a frame and sheathe it with drywall, and then fasten a few lamps. But it is quite another thing when the ceiling consists of several levels, each of which has its own separate lighting. In fact, even a person without experience is able to create something similar.
If there is enough time to gain theoretical knowledge, as well as the opportunity to try to embody this knowledge, then nothing is impossible. You just need to be prepared for the fact that the creation of a masterpiece ceiling with no less amazing lighting will take a lot of time, effort and patience.
Content:
To understand how the installation of multi-level plasterboard ceilings with lighting is carried out, you must first understand what they are. If the ceiling consists of two or more levels, then it may be called multi-level. Usually do two or three levels. Often, two levels are enough to completely transform the ceiling, but the four levels are already too much. Not only is too much space being concealed, the whole structure will also look cumbersome and ridiculous.
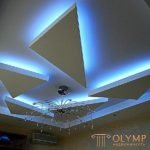
Several levels are used to make the wiring, to hide ventilation and other communications. Also, the second tier of the frame with plasterboard helps to install lamps in niches and boxes. Thanks to this, the light is not distributed around the room in the same way as from direct light sources.
According to this principle, the floating ceiling is made from a gypsum cardboard with lighting. All the lamps are hidden and only the light from them is visible, which makes it seem that part of the ceiling is floating.
Lighting on the ceiling can be open (lamps visible) and hidden (lamps not visible). Particularly popular is gaining hidden lighting. It does not hit in the eyes, and also allows you to teach the room in a new light, in the literal and figurative sense. It is a multi-level ceiling with plasterboard with illumination allowed to realize this idea in life. Several levels allow you to hide the lighting anywhere and feed it into the room from any angle.
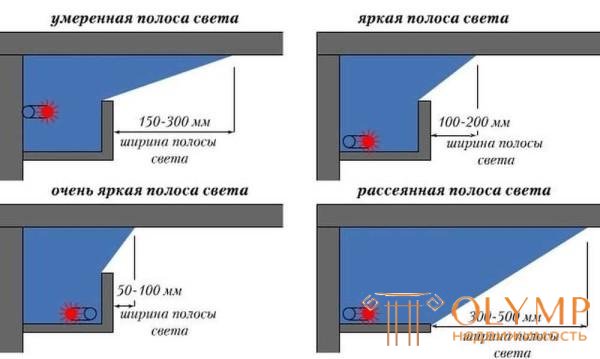
Light can be supplied at any angle.
What nuances still need to pay attention?
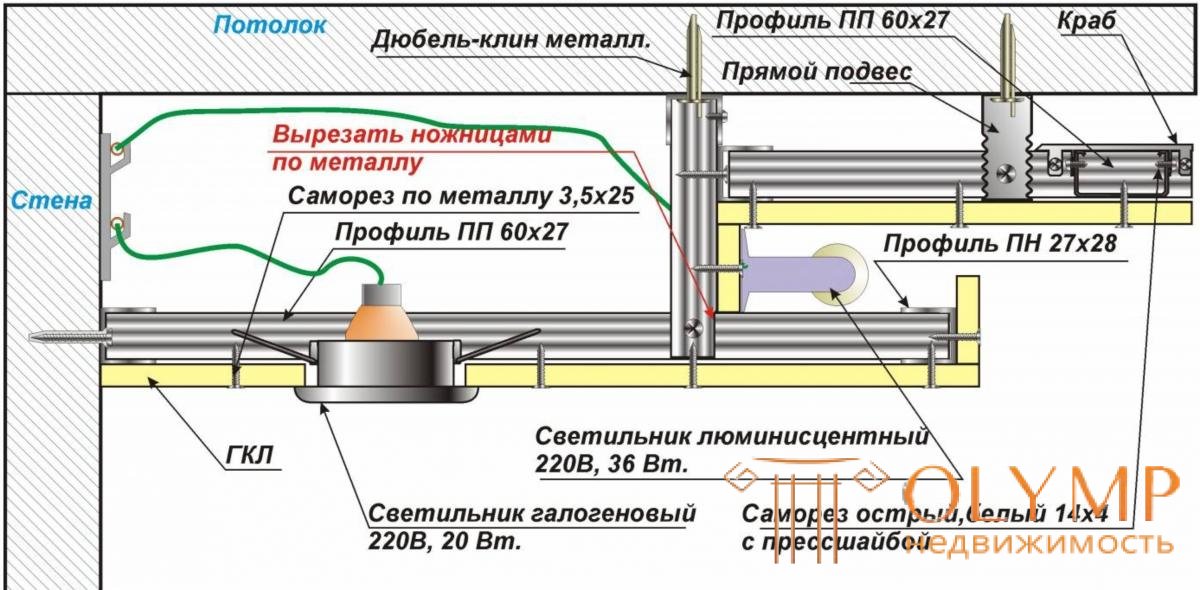
The scheme of the suspended ceiling of plasterboard with lighting
At this stage, you need to decide on the design of the future structure, and then on the number of tiers. We will consider everything on the example of a two-level plasterboard ceiling, because this is the most popular design. If there are more levels, then they are done on the same principle as the second level.
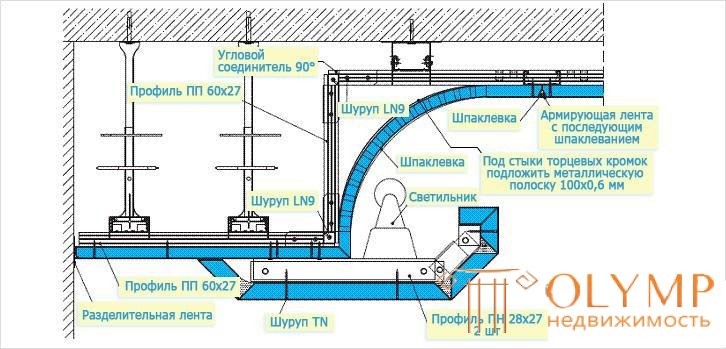
The scheme of a two-level plasterboard ceiling with lighting
You can come up with your own design, but first it is better to look at existing examples. From them it is possible to find out that curvilinear elements are in fashion. It may seem that you can not afford to assemble a curved multi-level ceiling of plasterboard with lighting, but this is only the beginning. Spending time on the sketch, will come to the realization that everything is not so difficult.

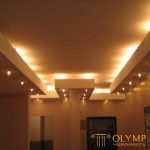
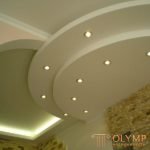
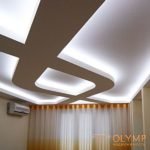
When creating a drawing, you need to specify not only the fixing points of the lamps and the shape of the ceiling, but also the locations of all the profiles in order to properly assemble the structure. Even an experienced master will not risk placing this entire structure by eye.
Before installing the frame, you need to think about the fixtures that will be used. In advance, you need to decide on a budget, because the price range is enormous. You should also know in advance whether the lighting will perform its main function or play the role of a decorative element.
Some lighting systems are so sophisticated that their installation may require the involvement of a specialist. Therefore, the ease of installation should also be considered in advance. Usually suspended two-level plasterboard ceilings with lighting use the following types of lamps:
Most often used recessed lights, classic chandeliers and LED strips.

The main types of spotlights
It is not necessary to dwell on one thing, because you can combine. Suspended ceilings are very often equipped with spotlights. They need a lot to give enough light, but such lighting can be evenly distributed throughout the room. They are used to zoning an area, highlighting it with their light. Such lamps are preferred because of the simplicity of working with them.
Light bulbs and wires can become very hot, which is fraught with problems. Poor insulation, poor wiring and improper installation of lighting can cause wiring to melt and cause an unpleasant odor. In the worst-case scenarios, a fire may even be possible.
Fiber optic lighting is used in addition to the main, because in itself it will not provide enough light for the room. And its cost is clearly not in the budget segment. Another decoration can be led strip. The options are quite enough to get the desired result after the repair.
| Average thermal performance | |
| Incandescent lamp (W) | LED lamp (W) |
| 45 | four |
| 50 | 6 |
| 65 | eight |
| 80 | ten |
| 100 | 12 |
| 125 | 15 |
| 160 | 18 |
Before you build a multi-level ceiling with drywall with lighting will need to spend some more preparatory work. It will be necessary to stock up with standard fasteners and tools for such works. We are talking about different profiles, suspensions, laser level, plasterboard ceiling, screwdriver, etc. You should also consider the wiring layout, prepare corrugations and fasteners for electrical wires. If you need to lay a new wiring to the ceiling lighting, it is better to make walls now and not later.
With the ceiling itself do not need to do anything. Unless to remove friable plaster that it did not pour down on the head during operating time. Someone likes to remove old coatings like paint and wallpaper from the ceiling, but there is no need to do this. In the end, everything will hide away from drywall. But the cornice and chandelier will have to be removed.
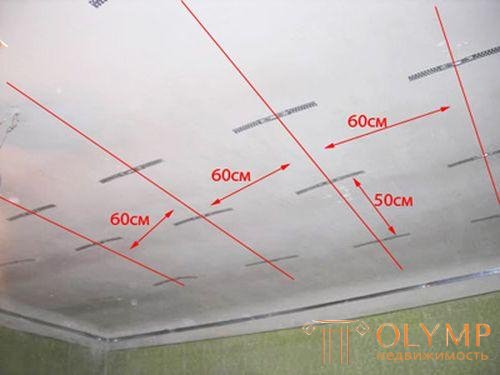
Example of standard ceiling marking
Now go to the markup. This is a completely standard process that does not require special skills. It is necessary to find the lowest point of the ceiling. This is easy to do with a laser level . With the water level, the search will be a bit long. From this point back down at least by the thickness of the profile. You may have to retreat 10 cm if you need to use insulation or wiring for lighting at the first level of the ceiling. The resulting label is transferred to all walls, and lines are drawn that will indicate the lower boundary of the mounting of the guide profile.
To easily assemble the frame of a two-level plasterboard ceiling with lighting, it is necessary to draw 4 more parallel lines on each of the four walls. These lines will be 8-10 cm below what has just been made. They will indicate the lower limit of the guides for the second level. If required, the third level is also indicated.
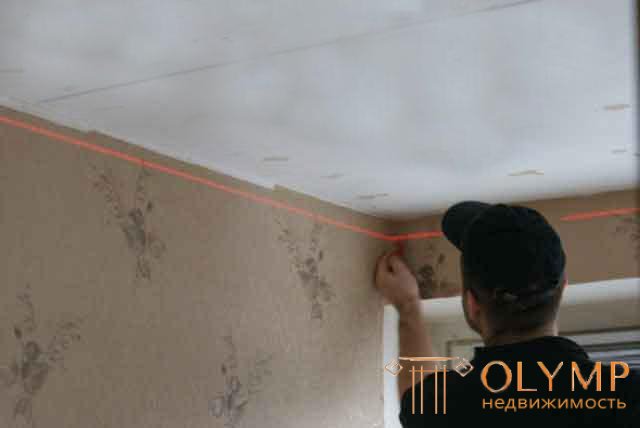
With the laser level, all work is done many times faster.
On the ceiling with a step of 50-60 cm from edge to edge are parallel lines. They indicate the attachment points of the rack profile that will be inserted into the guides, and to which the drywall will be fixed. On these lines along the entire length with a step of 60 cm, make a cross mark. Suspensions will be installed here.
The original markup ends here. Immediately it will not work out to draw everything under the ceiling of drywall with a niche for lighting. Therefore, the markup for the niche will be made at the first level for the second.
The base level of the ceiling is going according to the standard scheme. There is certainly an option when the center is left empty for a stretch ceiling, and the frame is going around it, but we will not consider it.
The guide profile is attached along the perimeter of the wall where the marking was made. Immediately it is necessary to attach the guides for all levels. For this work, you will need dowels and perforator (mounting with a pitch of 60 cm is enough). We constantly help ourselves with a level so that there are no height differences.
Professionals, under certain conditions, can immediately attach the frame for the second level. But such work requires a lot of experience and a certain type of construction. So it is better to spend a little more time and materials, but surely make everything beautiful.
Suspensions are attached to the two dowels in the marked places of the ceiling. After that, the rack profile is inserted into the guides clearly along the lines on the ceiling. If done correctly, it will take place just under the suspensions. Usually assembling a multi-level ceiling with drywall with illumination use guides of 28 * 27 cm and rack profiles of 60 * 27 cm in size. In this case, the profiles perfectly fit into each other and hold tightly enough.
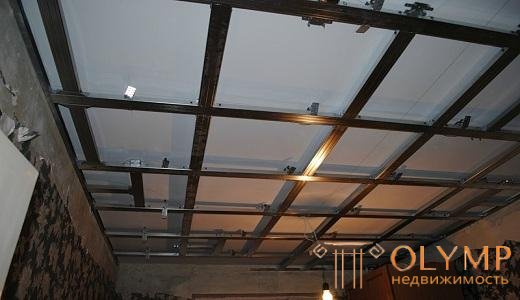
Classic frame for the first level of the ceiling
Fasten the profile to each other best prosekatelem. But this can be a problem for a beginner who cannot find the right tool for working with a ceiling profile. Therefore, it may be much easier to use small metal screws, so-called bugs.
The rack profile is attached to the suspensions with self-tapping screws. So that it does not go below or above a given level, you need to tighten the thread (fishing line) across the rack profiles at the bottom of the guides. For greater reliability, jumpers are inserted between the rack profiles in 60 cm increments. To do this, you will need to cut the profile, trim its edges and simply insert it into the frame. In such a simple way is going to frame the ceiling to which you can mount drywall.
If the double ceiling of plasterboard with light has an emphasis on the central part, then it can be done easily. Especially if the center is a rectangle. We are talking about cases where the second level is a border around the edge of the ceiling, or the second level is only the central part of the ceiling. In these cases, the base frame can be assembled only in the center or especially along the edges (depending on the situation). As a result, a framework for the second level is immediately made in the empty sections of the ceiling. Below you can see examples of the assembly of the frame of all levels at once.
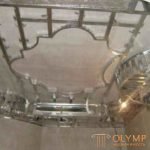
To create curved structures, cropped guides are used. For this, depending on the situation, the guide profile cuts ribs with a step of 5-8 cm or with one and the same pitch one edge and a back. In the first case, the profile will bend inward and outward, and in the second case it can be easily bent to the sides.
Bending profile is good to create circles, clouds, arcs, waves and other geometric shapes. It is attached to the drywall, then the jumpers are lowered down, to which the same cropped profile is attached, which repeats the specified shape. The result is a figure frame, and a multi-level ceiling of plasterboard with light gets beautiful forms. Using the same profile, you can create a framework of the first level, if necessary.
If the shape of the ceiling is not too complicated, then the second level of the frame can be fixed to the first level before plastering. If there are many curvilinear figures in the plans, it is better to sheathe the first level with drywall, and then attach the second level to it. You do not need to forget where the profiles are, because to attach a new level to them is much safer than just to drywall.
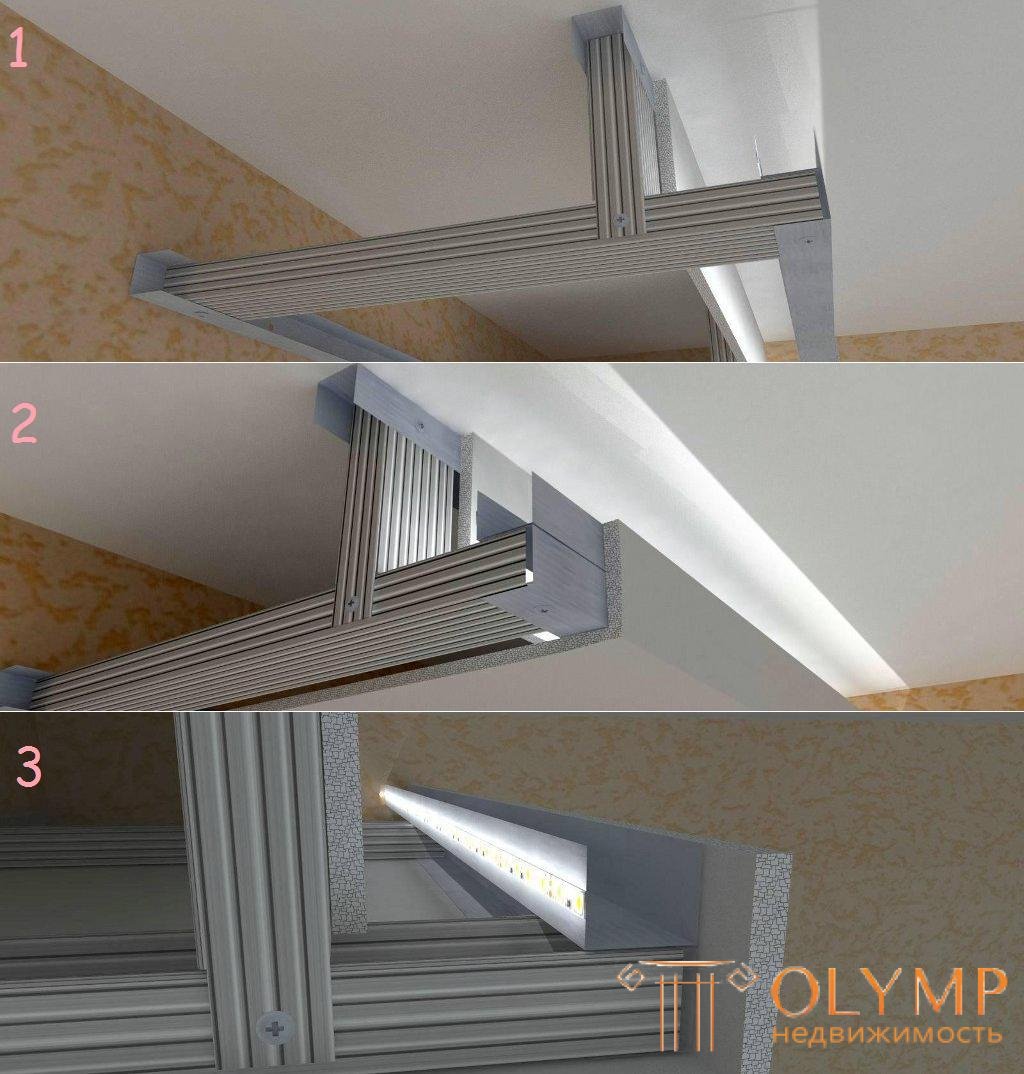
A box made of drywall on the ceiling with lighting is one of the ways to create lighting on a multi-level ceiling. This box is constructed from the guide and rack profile, as well as drywall. For this purpose, a guide rail is attached to the ceiling parallel to the profile attached to the wall. Then, rack-mounted vertical jumpers are inserted into the ceiling rail with a step of 40 cm. A profile is inserted into the wall rail, also with a step of 40 cm. The inserted jumper and the profile are fastened together at a right angle.
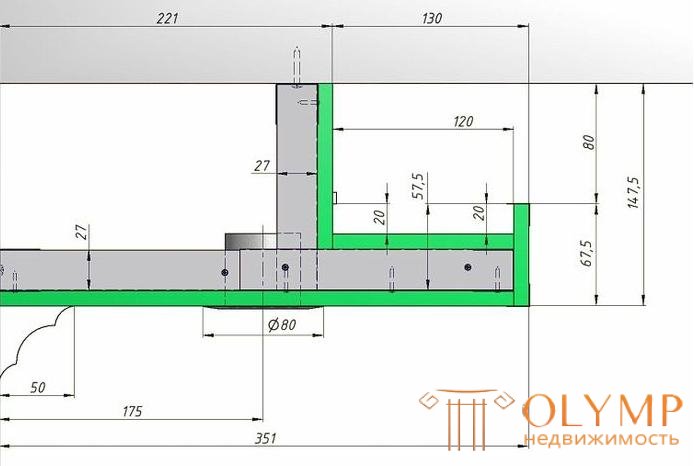
Possible sizes of a box for the hidden illumination
The profile parallel to the ceiling should still protrude by 10–15 centimeters after being fastened with a post-bar. This protrusion will ensure the creation of hidden lighting in the box. You will get a construction with many profiles that protrude beyond the vertical of the rack profiles to which they are attached. Therefore, another profile is mounted on the bezel. After that, the structure can be sheathed with plasterboard. The result should be a box and a niche where the hidden lights will be installed.

Box for hidden lighting
According to this scheme, the ceiling is often made of a two-level drywall with a diode illumination. The diodes are installed in the created niche and are not visible, but there is light from them. Especially effectively in this case the LED tape will look. Just do not forget that for its installation using special non-flammable sleeves.
The above method is only suitable if the box protrudes slightly from the wall. Although if he performs significantly, it will not be a box, but a full second level of the ceiling. In any case, this technique is good if the hidden ceiling lighting is made of plasterboard.
Sheathing plasterboard frame, you need to consider a number of features. If you follow certain rules and recommendations, then there should be no problems at work.
Before plating GKL you can lay insulation materials (or sound insulation). However, it is necessary to make the correct insulation of wires and fixings of luminaires so that the insulating materials do not begin to smoke.
All wiring must be in insulating sleeves. Then there will be no possibility to change and correct something. On the ceiling, with the help of your sketch, labels are made where the lighting will be. Therefore, it is clear in advance where to lead the wires. If you plan to install a massive chandelier, then in this place you need to prepare mortgages for it. It will be attached to mortgages in the future for greater reliability.
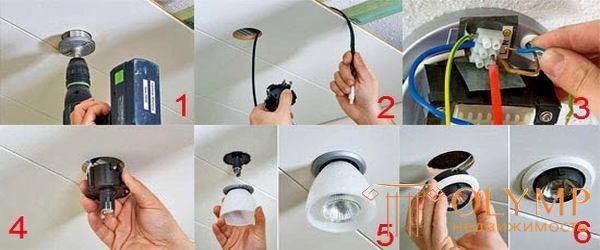
The main stages of installation of recessed fixtures
Recessed LED lamps for plasterboard ceilings are the most popular option. You just need to drill a hole for them in drywall after finishing. Then they are connected to the wires and fixed on the ceiling with a special mounting system. Everything happens quickly and simply, so this option of lighting in multi-level ceilings is in demand.
Before mounting the LED strip on the drywall ceiling, wipe the mounting location with a damp cloth. So all the dust is removed to improve light reflection. After that, the reflective tape is mounted to improve the dispersion of light. Then the LED strip itself is connected and installed.
Что бы оставить комментарий войдите
Комментарии (0)