When working with drywall, there are always a lot of questions, and I want to get around the difficulties encountered. Many are afraid of the need to create a framework for their profiles, so they are looking for simpler ways. Therefore, the idea to carry out the installation of drywall on the foam seems quite reasonable. With foam, this technique is very successful, but what about the GCR?
Content:
Each repair option has both advantages and disadvantages. Some prefer to mount drywall with a special frame, while others favor the use of special adhesive mixtures and mortars. What are the advantages of polyurethane foam, if applied in the installation of plasterboard?

One of the options for applying foam to the gypsum board
However, do not rush to fix the drywall on the foam, glad to save money. This method has its disadvantages:
It is also worth noting that there is a special foam for styrofoam, which is not very intensively expanded. It is best to use it, because the sheet will go evenly. It is worth thinking, maybe foam for drywall on the wall is not the best option and you should use special adhesive solutions that are more malleable in the work.
Those who doubt the reliability of the foam can watch this video.
There are two basic methods of installation, and we will consider both. However, regardless of the method chosen, certain procedures need to be performed. To drywall did not fall off from the wall to carry out preparatory work. You must perform the following steps:
There are recommendations for wetting the wall with water, so that drywall to the foam was attached more securely. It is believed that water improves the reaction of the foam with the wall. However, a direct relationship between wetting the surface and the reliability of this method of fastening GCR not found.
It is necessary to prepare sheets of drywall. It is not only about how to carry out calculations and cut the sheets to the desired size. In the sheets of drywall need to drill a few through holes. 2-3 holes at the top and bottom, as well as 3-4 holes on the sides and in the center (a total of 7-9 pieces is enough). Although glue is used for drywall glue, but for greater reliability it is better to additionally fix the sheets.
 Now the drilled drywall is put to the wall, where it will be fixed and marks on the wall in the places of the holes made. Further on these marks the wall is drilled, and the dowels are inserted. It is necessary to hammer the dowel into the wall, and not into the drywall. Foam rubber is glued along the perimeter of the sheet and near the holes made, which in the future will play the role of a spring.
Drywall is pressed to the wall with screws and washers that are screwed into the dowel. With the help of the level you can adjust to keep the sheet straight. If there is a curvature, you can tighten or loosen one of the screws. Foam rubber will spring and serve as a lining so that you can fix the drywall on the foam (foam needs space).
Through holes of a diameter of 0.5-1 cm are drilled across the entire area of the drywall sheet. The distance between the holes should be 20-30 cm. Now the mounting foam is blown into these holes. She comes under a small amount of gypsum crater, and then protrudes through the holes when she has nowhere else to move. The procedure must be repeated with all the holes that have been drilled.
When the foam dries, it will be possible to cut with a knife its part protruding from the holes. As for the self-tapping screws, now they can be screwed in completely, but without a washer, so that the cap drowns in the GCR. It remains to repeat the procedure with all sheets. You can install all the sheets at once, it will be easier to level the wall. For a better understanding of this method, you can watch its implementation in the video.
There is another way that drywall is attached to foam. For it, you need a wall as smooth as possible, because nobody will level anything with self-tapping screws.
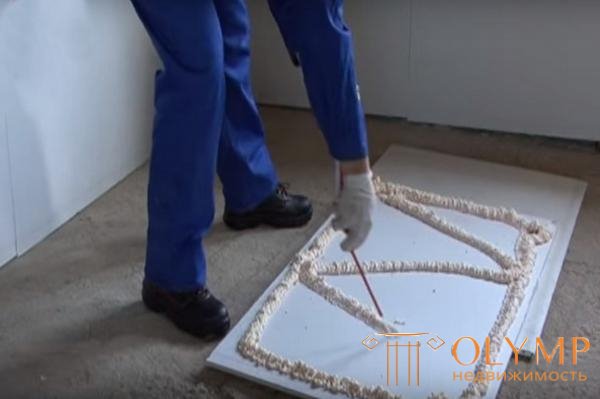
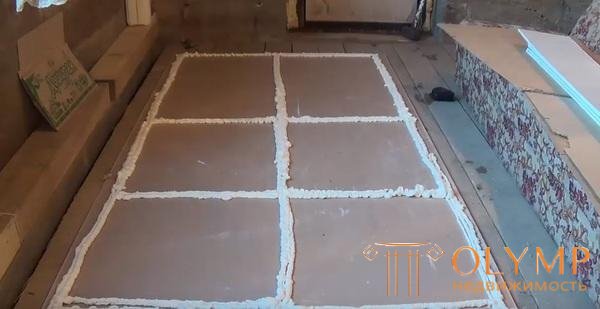
Polyurethane foam is applied directly to the back side of the sheet. First, around the perimeter, and then either in a zigzag in the center, or in stripes, or crosses in the center. They wait for 5 minutes, after which the sheet is pressed against the wall and it sticks to it. It is important to press each sheet with the same effort so that there are no strong drops. It is necessary to take not much expanding foam.

Zigzag foam application
When the mounting foam hardens, it will be possible for greater reliability to screw several screws into the wall through drywall, if possible. It is clear that with a concrete wall will not work. But if you are going to mount drywall foam on a wooden wall, then the use of screws at the end will be relevant.
Wooden bars can be fixed to the wall. They will allow the installation of drywall to the wall with mounting foam as smooth as possible, because the sheets will rest against the bars.
According to this method, you will need about one cylinder of foam for 6 standard sheets of plasterboard. More details about this method of installation can be found in the video below.
Что бы оставить комментарий войдите
Комментарии (0)