The usual suspended ceiling made of plasterboard can be done by everyone. A two-level ceiling is a more difficult task, but also feasible. However, curly ceilings made of plasterboard - is quite another thing, because to create them you need a lot of strength and skills. Nevertheless, the beauty that comes out in the end is worth all the efforts that will have to be made in the process.
Content: [hide]
Like any design, multi-level figured ceilings have certain advantages and disadvantages. Let's start with the positives.
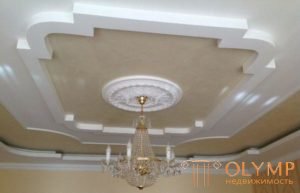
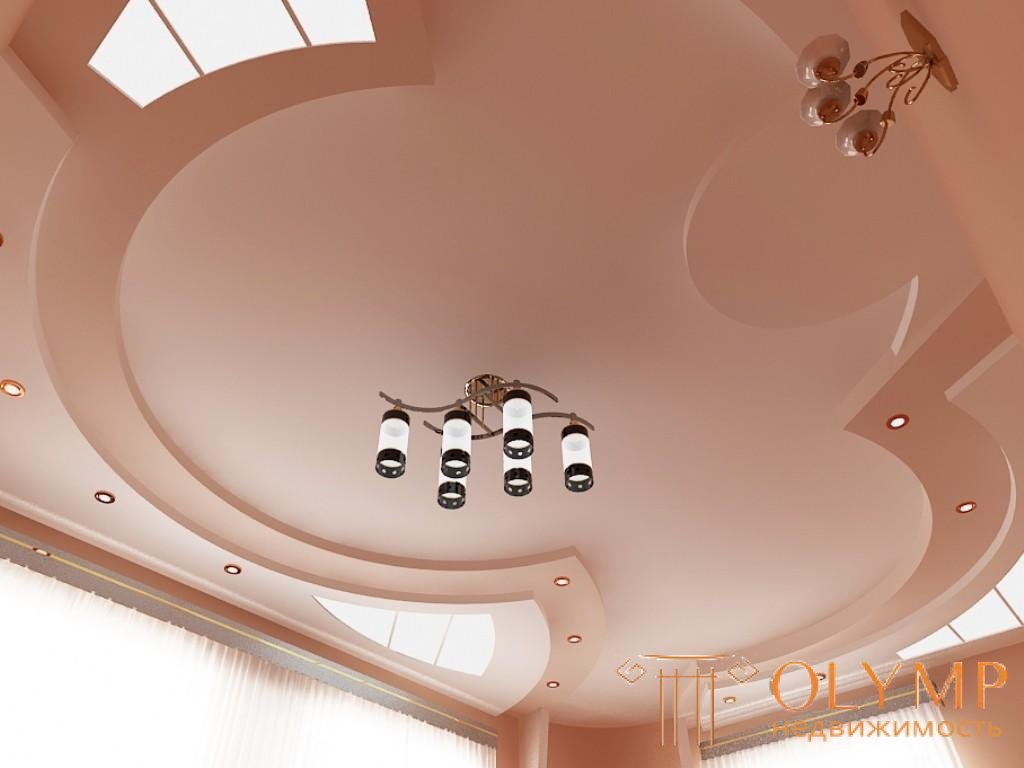
 The ability to use different types of lighting in different combinations. Such lighting is built very easily due to the multi-level design. Recessed LED luminaires, spotlights, LED ribbons, classic chandeliers and much more can be used with curved ceilings.
 If you think only about the positive, it seems that curly ceilings made of plasterboard should be installed in every home. However, this design has its drawbacks, because of which you can think to mess with it. The disadvantages include:
 drywall ceiling is very fragile in the hands of a beginner because of its small thickness. And since you have to create a figured design, you can get a lot of waste.
 If the disadvantages do not scare, and the advantages were sufficiently convincing, then you can proceed to work.
It is necessary to prepare the ceiling for work as little as possible. To do this, they remove all the loose plaster from it so that it does not fall on your head during installation. You should also remove all unnecessary: chandelier, baguettes, etc. Some recommend surface treatment with antifungal formulations, but if we are talking about a regular room, this is unnecessary.
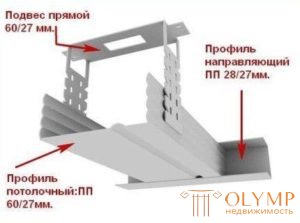
It should stock up on tools. This is quite a standard set: a screwdriver, a drill, metal shears, a cutter, a painting cord and a drywall knife. Do not forget about fasteners: guide profile UD, ceiling profile CD, dowels, self-tapping screws, profile connectors and hangers. You will also need plastic corners, which are used at the stage of preparation for the finishing.
Before work, drywall should be laid in the room where the repair is carried out. HL has properties to vary slightly in size depending on temperature and humidity.
To create a figured ceiling of plasterboard do it yourself, you will need to purchase a ceiling plasterboard. It is much easier to work with, and easier than the standard wall wall gypsum. Moreover, you do not need to take moisture-proof sheets, except that the repair is done in the kitchen. And even then, such a move is not always justified, because enough quality mixes that can protect any gypsum board from excess moisture in the kitchen.
The concept of shaped ceilings is too extensive. We understand their concept, but still need to decide on the future form of construction. You need to focus on the possibility of creating a certain shape (how simple and affordable it is), as well as on the room in which the renovation is being carried out (the design of the nursery and kitchen is clearly different). Perhaps the design will be due to the need for zoning of the room.
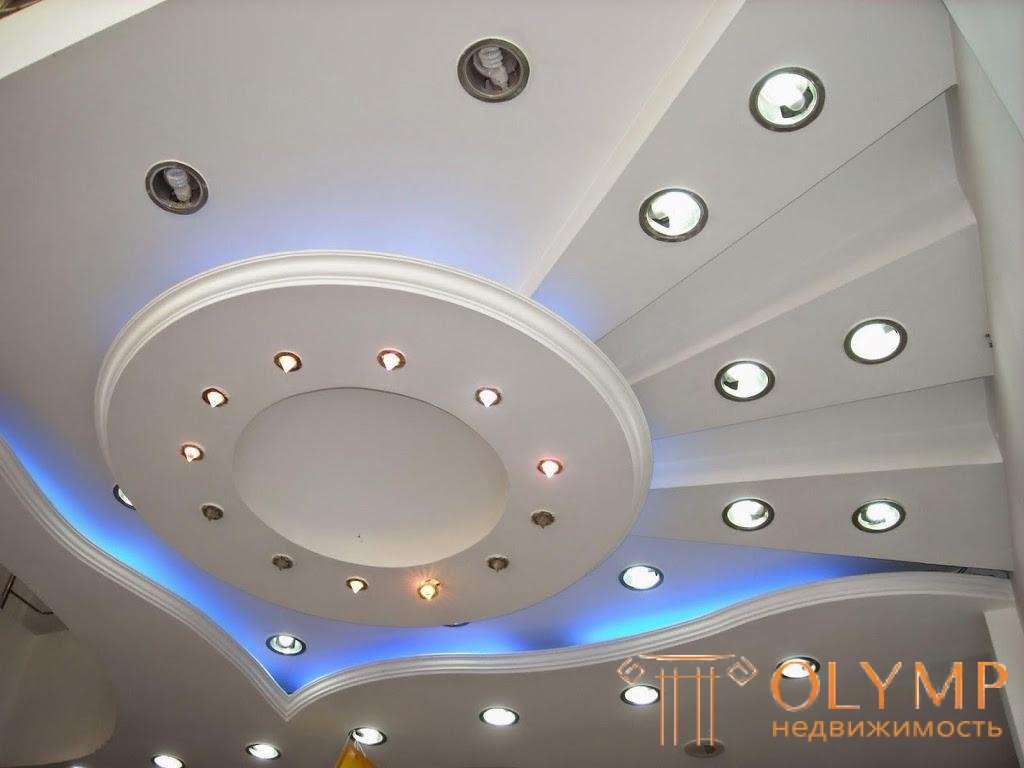
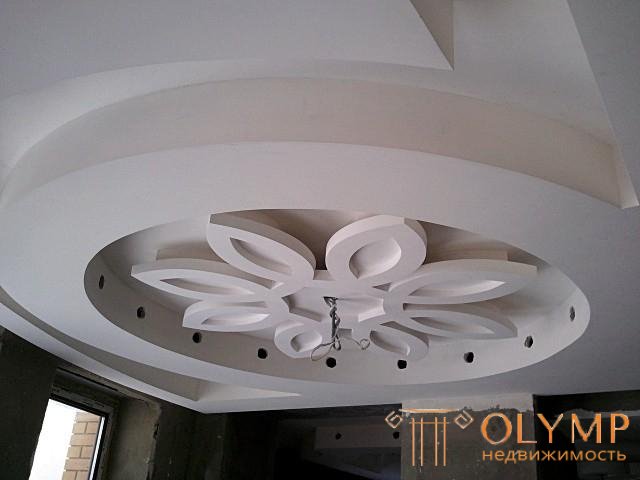
In the nursery choose an abstract design that fits the age of the child. It can be a starry sky (spotlights are used) with planets. The hall is characterized by the use of round forms in the center. In the kitchen, most often choose a design that helps divide it into zones. The bedroom looks gorgeous oval ceiling or a crescent moon with hidden lighting (floating ceiling).
Whatever unusual drywall ceilings are created, they must be functional. In the pursuit of beautiful figures, many forget to think about the right lighting, which is why in some areas of the room there is a lack of light.

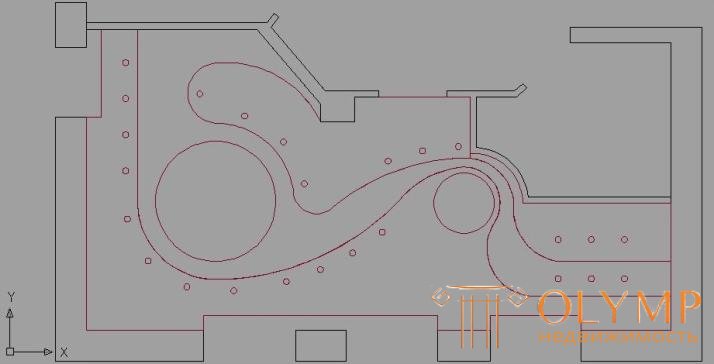
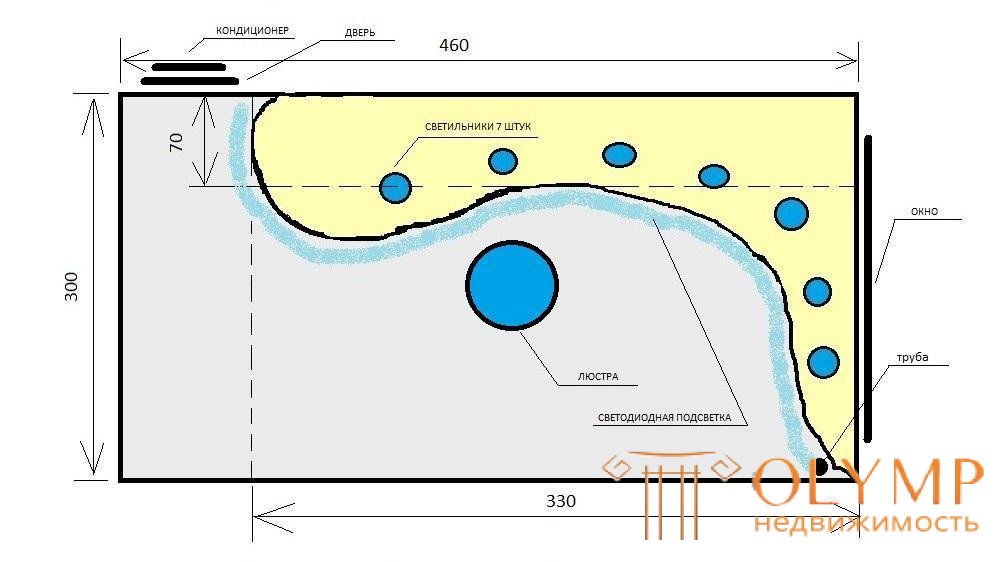
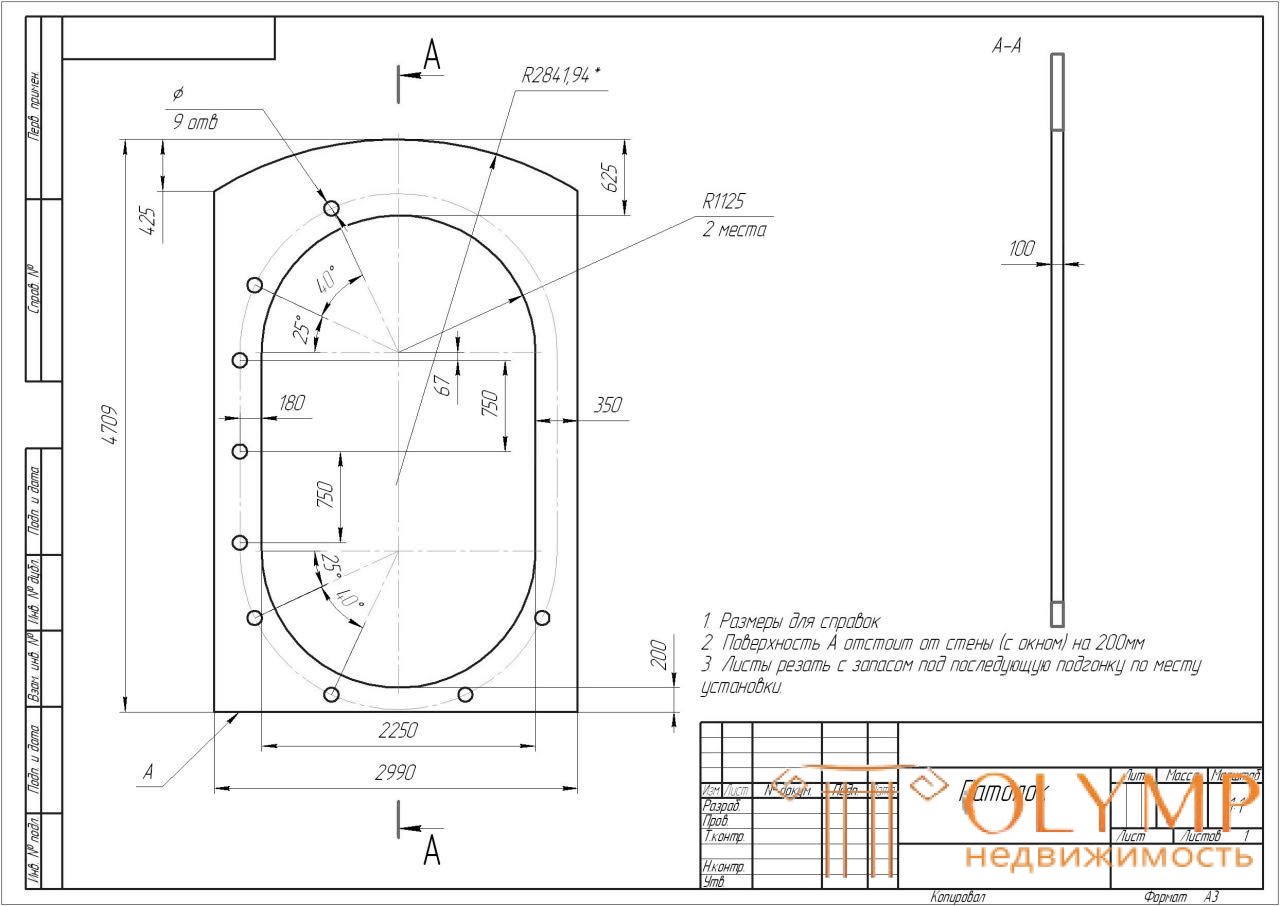
When everything is clear with the concept, it needs to be transferred to paper. This is a very complex and lengthy process. Not everyone will be able to quickly draw on a piece of such a curly ceiling, what he wants. However, it will be much easier to work with a sketch on the spot, because it will be clear how and where to mount the framework. Perhaps, you first need to see what curly ceilings of drywall are, and then create your own.
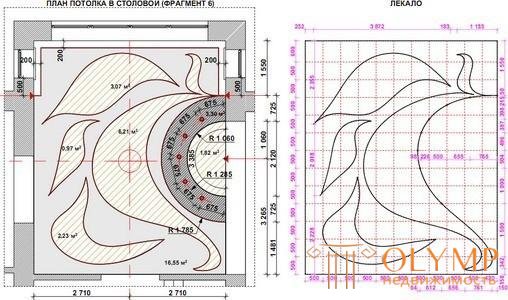
All work depends on the correct ceiling marking. Errors in the markup can lead to curvature of the ceiling. Therefore, in such an important work can not do without a laser level. The step-by-step markup process is as follows:
 It is necessary to find the lowest point of the ceiling and retreat from it by at least the thickness of the profile used (indent is made more if you need to perform warming). This will be the height of the first level of the figured ceiling. Usually retreat 10cm. This is the standard indent for each level of a gypsum board ceiling.
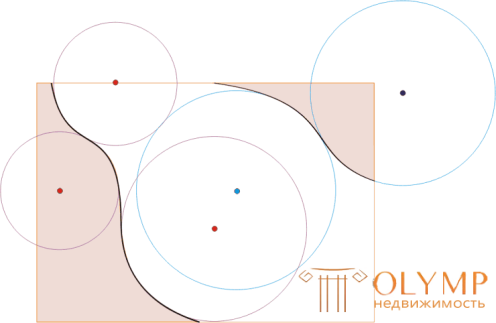
To create an arc, you can attach a pencil to the profile and use such a device as a compass
Most of the curved forms of the second level of the ceiling can be created by connecting arcs. Therefore, you just need to create arcs of different diameters with a compass and join them. So waves, clouds, ellipse and other geometry can be created. Such marking can be carried out both on the base ceiling and on the first level of the plasterboard construction. It all depends on the working draft.
 For the installation of the first level of the figured ceiling made of plasterboard, standard rules apply, regardless of whether it is shaped or not.
The guided profile is fastened along the marked lines on the wall with dowels with a step of 40-60 cm. With the help of the same dowels, hangers are attached to the ceiling in the planned places (two dowels in each). A ceiling profile is inserted into the center of the guide profile from the wall to the opposite wall along the lines marked on the ceiling. A thread stretches across the profiles to show the ceiling level. After that, the profiles are fastened with screws to the suspensions so that they are all on the same level (the tensioned thread serves as a guide).
Do not forget to attach the guides along the perimeter of the wall for the second level. Now this process is more convenient to do than later.
For greater strength, short perpendicular bars are inserted between the longitudinal bridges. Then you can go in two ways.
The choice of method depends on which patterns will be created. The second method is more difficult, so beginners rarely use it. Next, we will consider the first method of creating curved ceiling of drywall. Sometimes the first level is sewn partially, given that there will be subsequent levels.
Creating curvilinear forms on the second level of the ceiling depends on what kind of patterns you plan to perform. Therefore, the order of work will be slightly different depending on the designed elements.
You will need a UD or UW profile. Using scissors for metal or grinders, the profile is cut in increments of 5-7 cm. One side and the back of the profile are cut so that it bends easily along the second side. It turns out a kind of snake that easily bends in any direction.
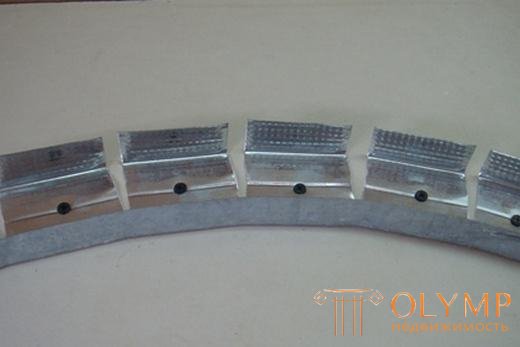
For greater reliability, the profile can be mounted every 5-10 cm.
This snake is mounted on the contours deposited on the ceiling, regardless of the created figures. These can be flower petals, waves, a cloud, an oval, a circle, or any other geometric shape. The profile is attached to the ceiling with such a step, which will be enough for it to clearly repeat all the contours of the conceived figure .
There are various curly plasterboard ceilings, in which the height of the second level varies. In some cases, the created figures require a larger volume (for example, a flower in the center of the hall), but often 10 cm of height is enough. Therefore, we cut a lot of rack profile of such length and fasten it perpendicular to the curved base profile. A mounting step of 20 cm will be sufficient.
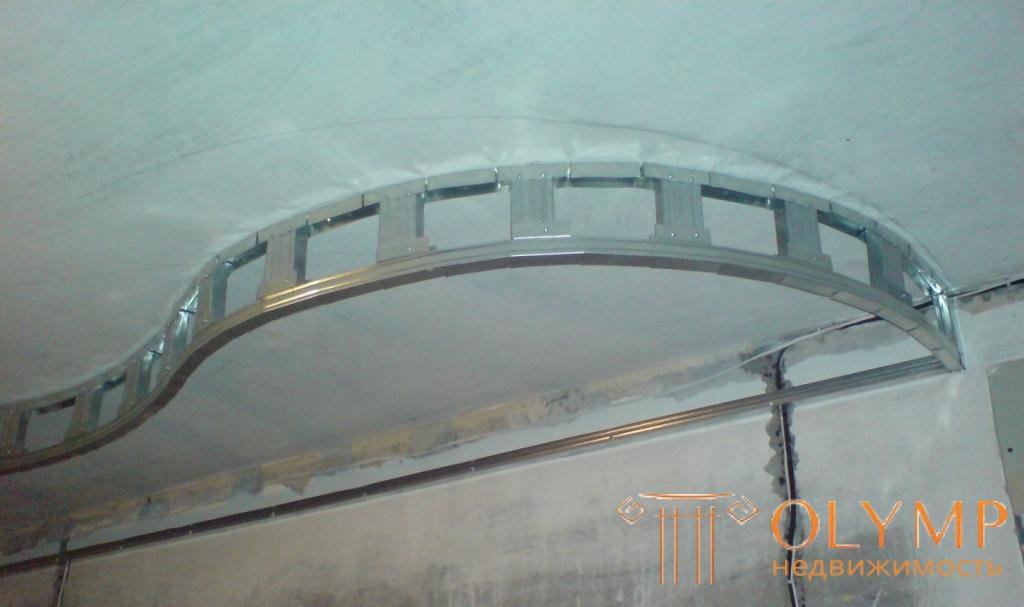
Carcass shape option
Again we make a snake as in the case of the first profile, but now we fasten it not to the ceiling, but to the jumpers inserted earlier. This creates a kind of frame. If the created figure has large dimensions, then it is advisable to install jumpers inside it, mounted on hangers. This is required for a more secure fixing of drywall.
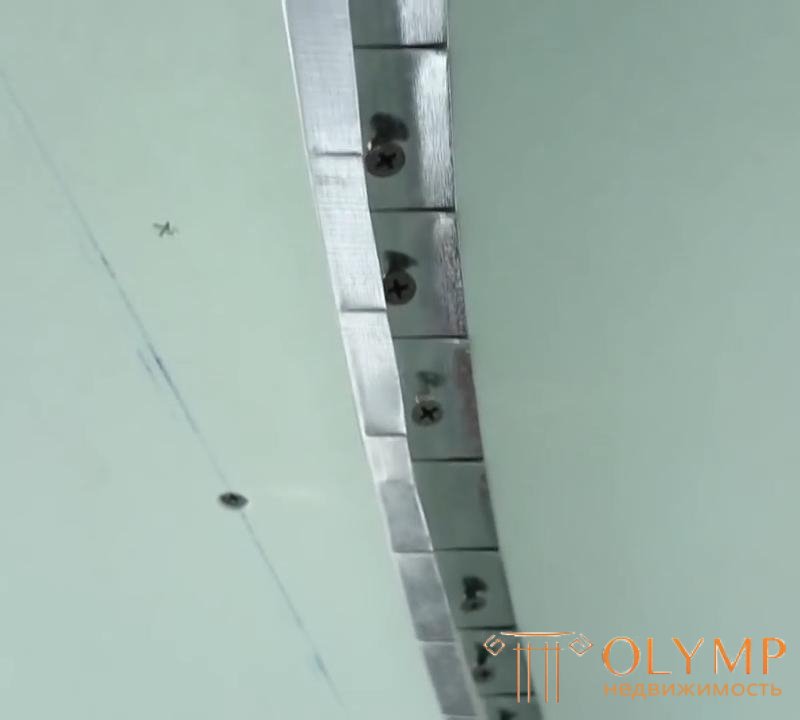
The cut side makes it much easier to attach the profile.
The differences of the second method are minor. In particular, a ceiling snake is made by trimming one side of a profile in increments of 5-7 centimeters and cutting off the second side. The profile is fastened to the ceiling by a cropped side, and this is possible due to the fact that there is no second side and it does not interfere with screwing the self-tapping screw. The trimming itself is even when the profile is curved outward. If it bends inward, the neckline should be V-shaped. You may have to screw a screw into each snake's “petal” if the shapes you create are very curvilinear.
With a small bend radius, you can use the usual GCR
In fact, our profile came out a corner, which is attached to the ceiling with one side. To the second side we file drywall of the required height. After that, on the inside of the drywall is mounted another ceiling snake. But this one will be made of a guiding profile with clipped sides. The rail is fastened so that it can later be inserted into the rack profile.
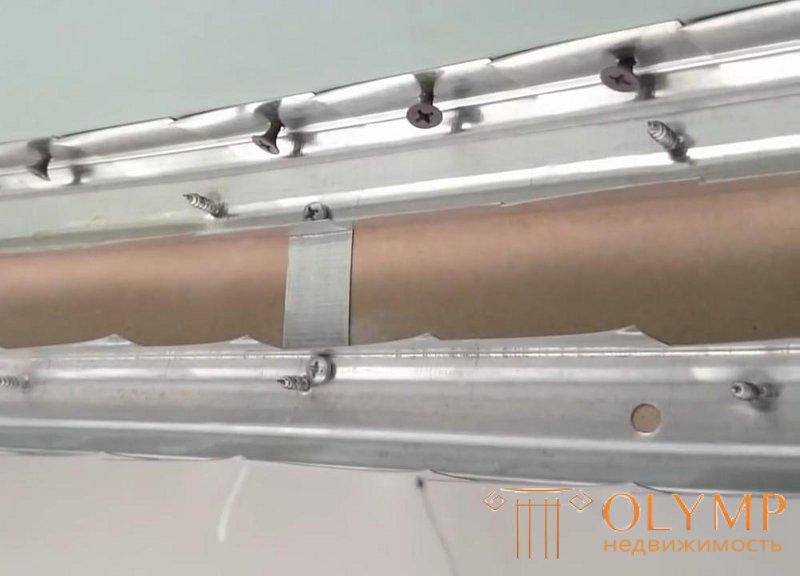
For greater reliability, the profiles can be interconnected with metal jumpers.
The rack profile is inserted into guides that are attached along the perimeter of the wall and into guides that were previously bolted to the drywall. If the jumpers are very long, then they will need to be additionally secured with suspensions.
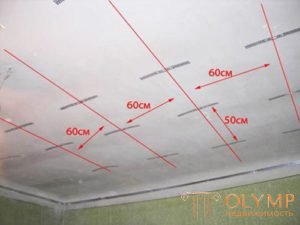
60 cm jump spacing
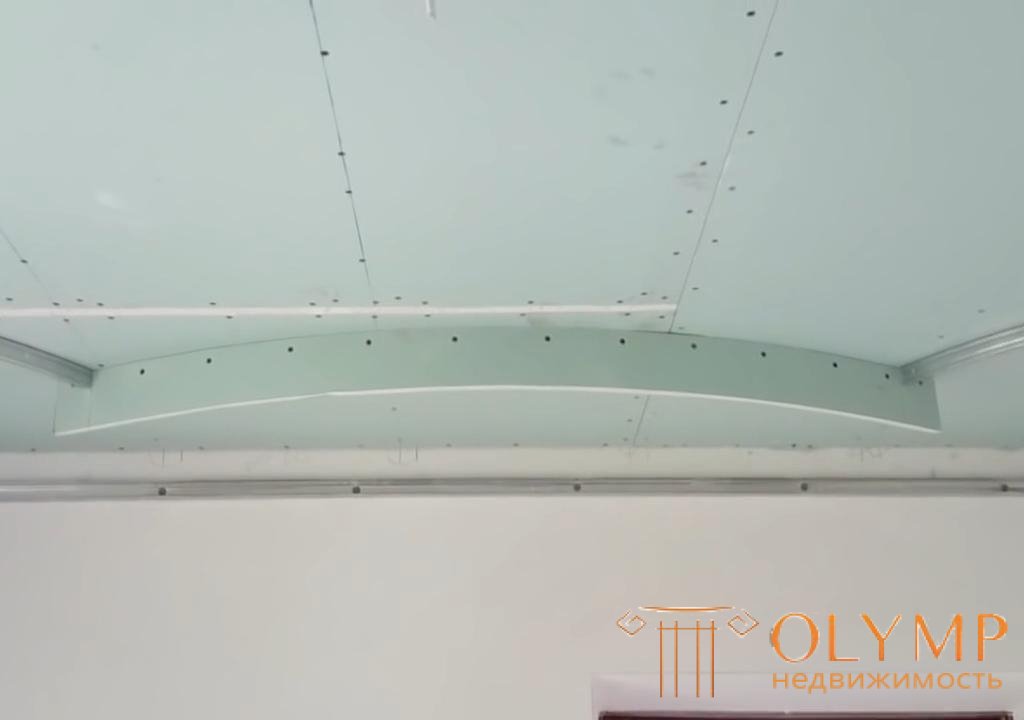
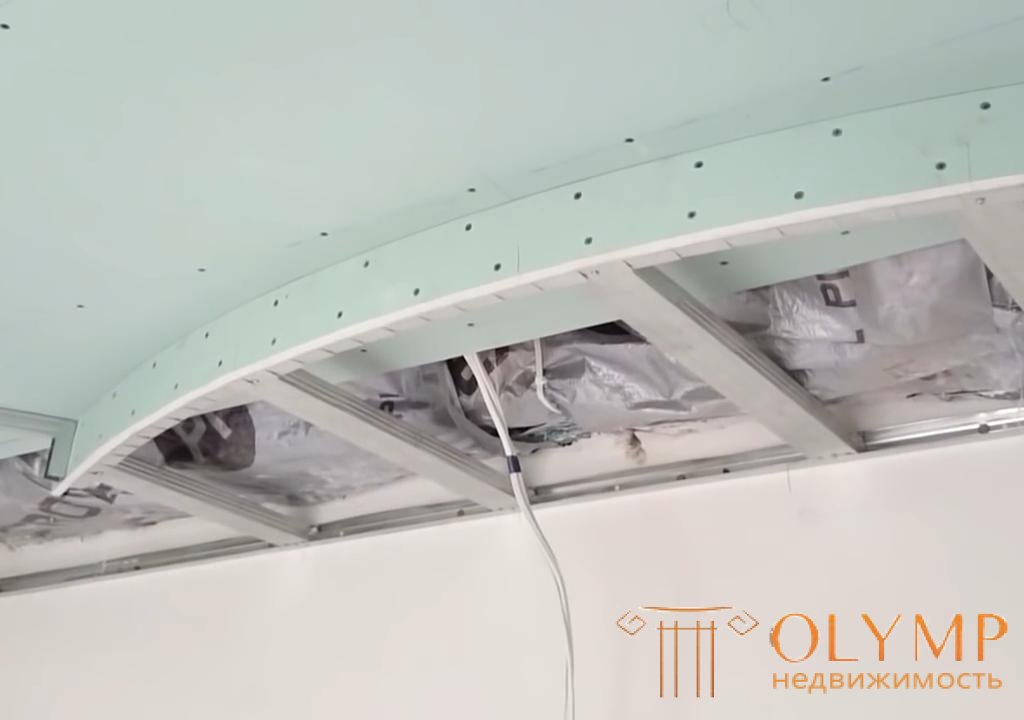
At this stage, there is nothing complicated. You just need to attach drywall on all external contours of the frame. Self-tapping screws fasten with a step to 15 cm not only on perimeter, but also in the center where there are metal crossing points. The screws go down so that the caps do not stick out, but they also do not sit too deep.
Of course, there are some problems with how to sheathe figured ceilings from drywall. Below drywall goes smoothly, but on the sides it should bend in shape of the figure. There are three ways to solve the problem.
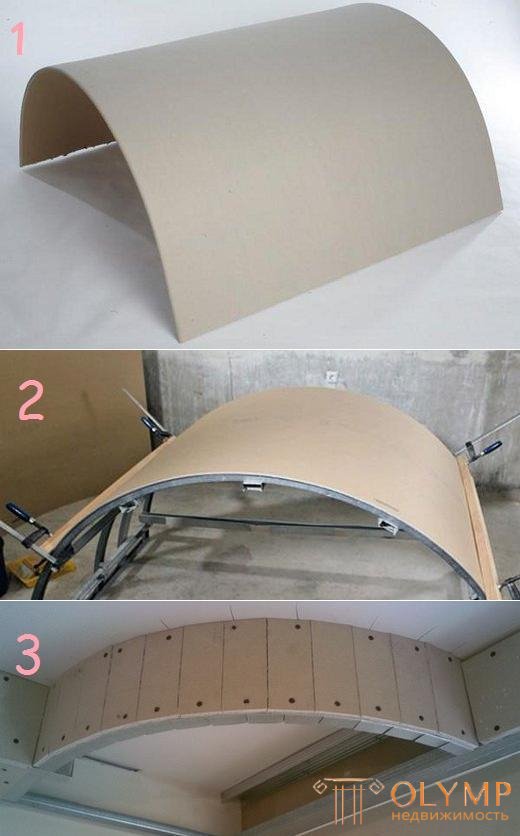
3 options for creating curved lines
If, when the gypsocraton bends, it begins to crack, then this is a sign that it will break now. No more bending is necessary.
It is necessary to choose one of the three methods described above in order to fasten the gypsum crack from the end of curvilinear figures. In most cases, the first method works well. But with too steep rounding will have to resort to the third method. The second method is good because you do not need to buy expensive ceiling gypsum board and get a flat surface. However, it is very laborious.
When the drywall is bolted to the frame, you will need to putty everything and prepare it for finishing. Here, a plastic corner is useful, which bends well and will easily fall on the curvature of the figured ceiling made from drywall.
Что бы оставить комментарий войдите
Комментарии (0)