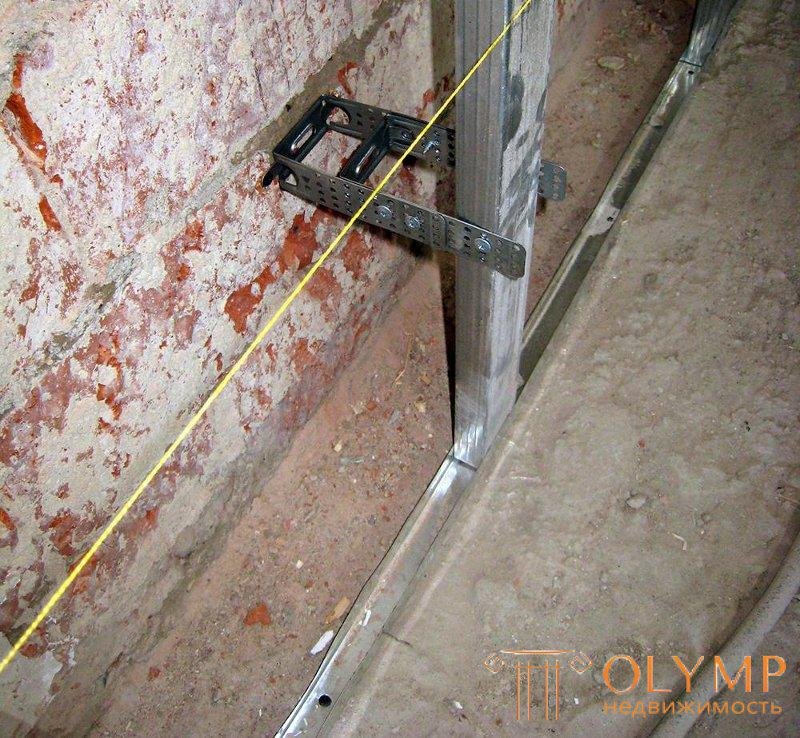
One way to align the walls is to use a metal frame that is sheathed with drywall. This method has to be resorted to in cases where the walls are so uneven that otherwise it is impossible to eliminate this defect. Or simply do not want to use other, more complex options. Alignment of the walls with plasterboard and frame is an economical way to repair the apartment, correcting the mistakes of the builders.
Content:
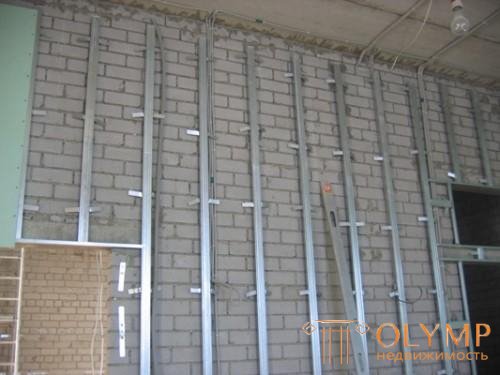
Correctly assembled frame - a pledge of a smooth wall
The undoubted advantage of using profiles is the fact that they can be used to assemble a frame. The frame itself is a rectangle with vertical uprights, and sometimes with horizontal bars. This is a flat structure, which is sheathed with drywall, which means that a surface without a curvature will be created. At the same time, it doesn’t matter what happens with the wall, because the curvature frame will not be visible. In essence, a new, flat wall is being created.
The disadvantages of this method include the need to use a variety of tools that not everyone has at hand. It is worth talking about used tools in more detail.
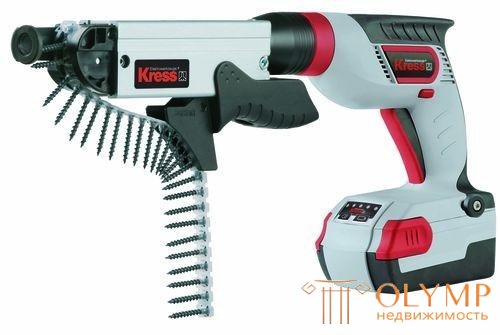
The tape screwdriver is a vivid example of a tool that speeds up work, but you can do without it.
During the work can not do without certain tools. Some of them are mandatory, while others simply speed up and simplify the workflow. Let us see what tools are needed to level the walls with drywall and frame as effectively as possible:
You may also need tools such as a tape measure, a cutter, a paint cord, and a chisel from the drywall.
As for the materials, everything is simple: drywall, dowels, screws, suspensions and profiles. Normal drywall is suitable if the wall leveling does not take place in a bathroom or toilet. In this case, you need to take moisture-proof sheets that are green. Dowels 40-60 mm long will be enough.
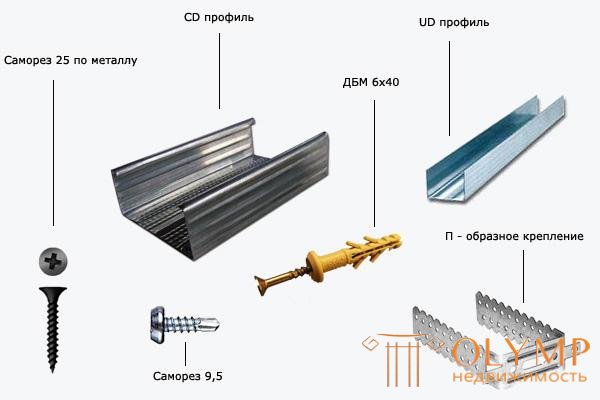
All the necessary hardware to assemble the frame
As for the screws, the standard screws 3.5 * 25 will fit (screw diameter 3.5 mm, screw length 25 mm). According to the rules, after screwing in, the screw should protrude from the back side of the profile by at least 1 cm. If you add the thickness of the gypsum board to 12.5 mm and the profile thickness to 1 mm, it will turn out that you can use the 25 mm screws. If it seems that they are short, then you can take 3.5 * 35, but not more. For fastening profiles to each other, special metal screws with a length of 9.5 mm are used.
U-shaped mount, or as it is also called suspensions, is also necessary. With their help, not only the suspended ceiling is assembled, but also the walls are leveled. They have a standard shape and size, so it will be difficult to make a mistake.
The classic option is the combination of profiles UD 27 * 28 (hereinafter referred to as guide) and CD 27 * 60 (hereinafter rack). A frame rim is created from the rails, and the rack profile is inserted into the rails, creating racks and lintels. It is necessary to select a profile of such dimensions so that later one can be inserted into another one, otherwise the framework cannot be assembled.

Existing profiles from the company Knauf
Even before leveling the wall with plasterboard with a profile, you need to prepare it, as well as make the layout in the room. As for preparation, it is reduced to a minimum. Someone advises to remove old finishing coverings from the wall, clean it, cover it with special antifungal mixtures. But all this is a waste of time, effort and money. Who cares that the wall will remain on the wall, if they do not affect anything and they will not be visible.
If desired, you can upholster the old loose plaster, so that in the future not to listen as it slowly crumbles behind the frame with drywall.
If the wall is aligned in the bathroom, then it can be treated with a special solution that prevents the development of fungus and mold. Such a decision would be logical due to the increased humidity in the bathroom. In other rooms, such actions do not make much sense. Much more important to make the correct markup.
You need to mark the ceiling, floor and side walls. It is necessary to draw four lines along which the frame will be attached. Alignment of the walls with a plasterboard with a frame with your hands requires great precision, so it is highly desirable to get a laser level.
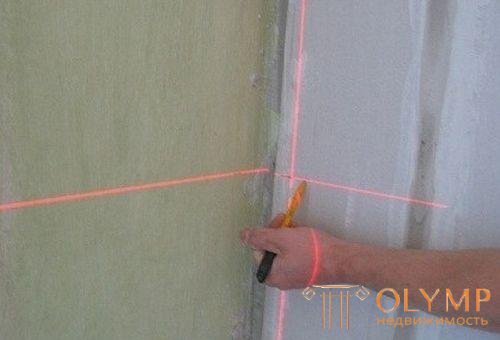
Using a laser level greatly simplifies not only the markup, but also the process of assembling the frame
It is necessary to determine where the wall collapses in order to know the place of its maximum projection in the room. This is easily determined by the laser level, which will immediately show where to draw lines for marking. With the help of a paint cord, all the lines are banged on four guiding surfaces. If there is no laser level, the process will be as follows.
The video shows how, without a laser level, the frame can be assembled with standard tools.
In order for the new wall to be as smooth as possible, it is necessary to build the perfect frame. Although the markup has already been done, but in the process of work you will need to use a level so that everything works out perfectly.
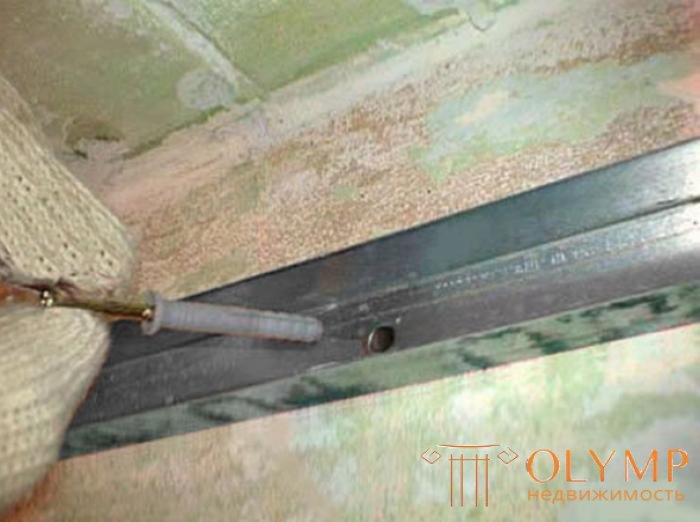
This is how the dowel is inserted to fix the profile.
Fix the guide profile with dowels. For this, a hole punch is punched in the guide and wall (floor, ceiling) with a pitch of 40-60 cm. The dowels are fixed sufficiently firmly so that you can not be afraid that they will move away from the surface. Alignment of the walls with a drywall profile begins with the guides, and if they are set crookedly, then nothing can be fixed any further. Therefore, you need to use the level, checking how smoothly installed guide.
You need to start from the floor, then make the ceiling, and then attach the guides to the walls. The guides should go all the way so that there are no gaps anywhere. In the corners you can do in two ways:
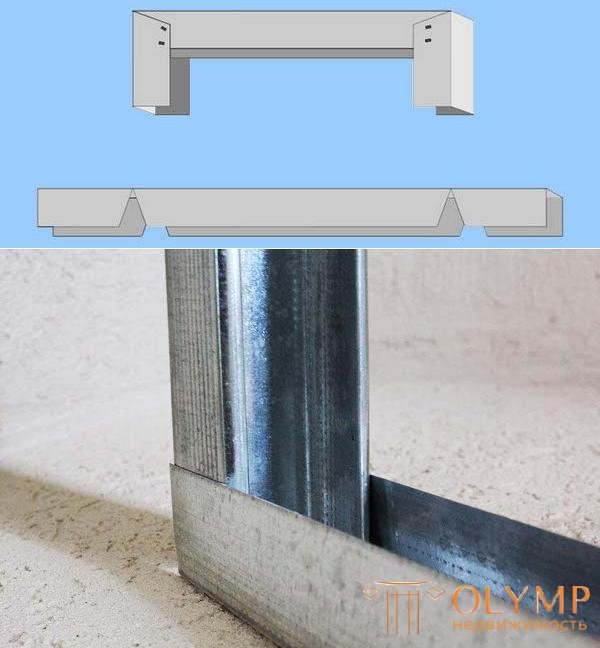
Variants of connection of guides in corners
When the frame frame is formed, you can begin to install rack profiles. They are pre-cut so that the length was 1 cm less than the distance between the rails on the floor and ceiling. After that, the racks are turned into a frame and installed vertically in increments of 40-60 cm. The same distance is kept from the walls.
Some craftsmen put racks on both sides against the wall, without using guides on the walls. Alignment of plasterboard walls with the frame can be carried out in this way, but the guide profile is cheaper than the rack. So think for yourself.
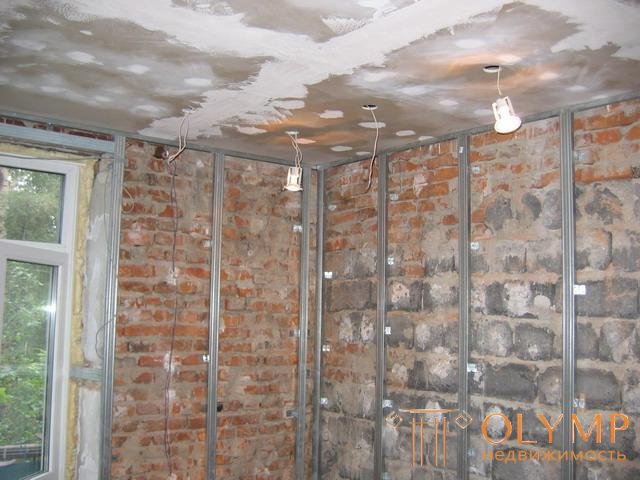
You need to align all the walls at once, and not to do them one by one
Racks must be attached to the wall, and U-shaped suspensions are used for this purpose. They are attached to the wall with dowels so that their center coincides with the center of racks. They can be fixed in advance, while there is no rack profile, and it does not interfere.
Practice shows that it is difficult for beginners to calculate where the racks will be and where you need to install the hangers. Therefore, they are fixed in place. Especially since the fixation takes place with the help of the ears, which protrude beyond the profile plane. Therefore, with their fastening, even with a perforator, no particular problems should arise.
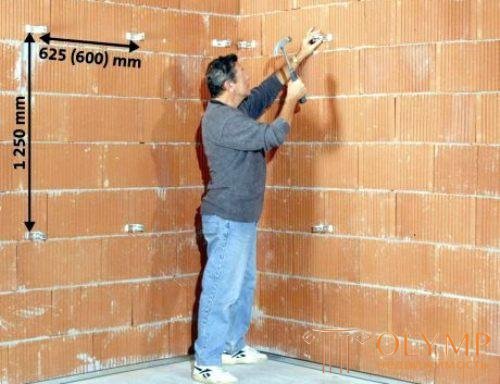
Pre-mounted hangers can serve as a guide for racks.
For one rack profile you need two suspensions, if the ceiling height is standard. The distance between the suspensions vertically should be 1-1.3 meters. The distance to the floor and ceiling may be slightly less. The distance between the U-shaped hangers horizontally depends on the pitch with which the racks are installed (40-60 cm).
Before you attach the rack with screws to the suspensions you need to tighten the nylon thread. In this case, the alignment of the walls with plasterboard and frame will be better. Thanks to this thread, it will be seen how the posts should be mounted so that the new wall does not come out a curve.

Racks will need to temporarily push a little against the wall so that they do not delay the thread
It is necessary to fasten the thread on the extreme guide with the help of a self-tapping screw, and then similarly fix it on the guide of the opposite wall. The thread should be taut. It should be carried out 20 cm above each level of suspensions. Starting from any edge, rack profiles are attached to the suspensions so that there is a gap of 1 mm between the posts and the nylon thread. After all the racks are fixed in this way, there is no need to fix the rack profile to the rails.
If heat insulation is used, it is inserted now. Ears of jumpers are bent in inside and are an additional deterrent to insulation. If mineral wool or similar materials are not used, then immediately bend the lugs of the jumpers so that they do not interfere with further work.
Separately, I would like to dwell on the horizontal jumpers. They are made of their profile CD 27 * 60 in order to make the whole structure more durable and stable. Also, such jumpers are good in that they are used to fix the edges of drywall sheets. Drywall is cut and installed so that all its joints fall on a rack or jumper. As a result, the installation will be better.
However, if the racks are set in 40 cm increments, then there is no need for horizontal jumpers. Additional rigidity is already attached to the suspension. If the pitch is 60 cm, then jumpers can be used for greater reliability.
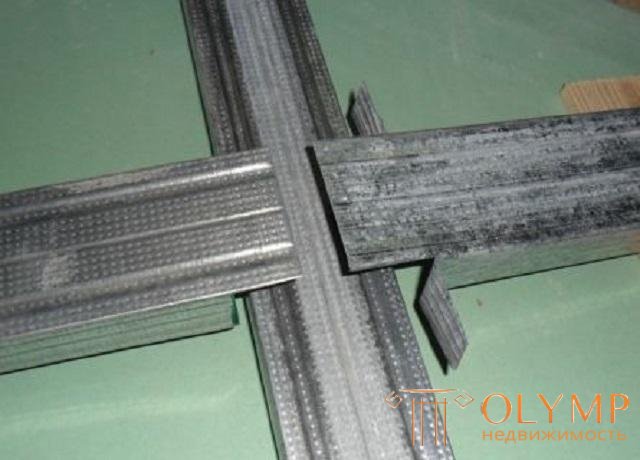
The option of cutting the profile to create a jumper
If the distance between the racks is 60 cm (the distance between the centers of the installed rack profiles), then the jumper length should be slightly less than 60 cm. The distance between the edges of the racks is 54 cm. It is enough for the jumper to fit each rack by 2 cm. So the length 58 cm is optimal. However, it should be borne in mind that in order to install jumpers on the very edge, they should be slightly shorter (with a narrower profile, there is a narrow guide profile). You can make the necessary calculations yourself using roulette.
The cut jumper must be trimmed with metal scissors from each side along the ribs. As a result, the two ribs should be bent to the side (they can be cut off if disturbed), and the back will protrude. It is attached to the rack profile. Fastening to the racks is carried out with small metal screws. Jumpers are installed with a step of 60 cm vertically.
The alignment of the walls with drywall to the frame comes to an end. All the most basic work has already been done. The frame is the most important in the whole process. If it is assembled correctly, then nothing to worry about. Only a trifle remained - sheathe the frame with drywall and finish the finish.
A standard drywall sheet is 1.2 meters wide. This means that it can be mounted to the wall vertically and its edge will fall on the rack profile, which is set in 40 or 60 cm increments. If the pitch is 50 cm, then the plasterboard should be mounted horizontally, because its length is 2.5 or 3 meters. In this case, the joints will again fall on the rack profile. As stated earlier, if lintels are used, they should be installed so that the drywall joints fall on them.
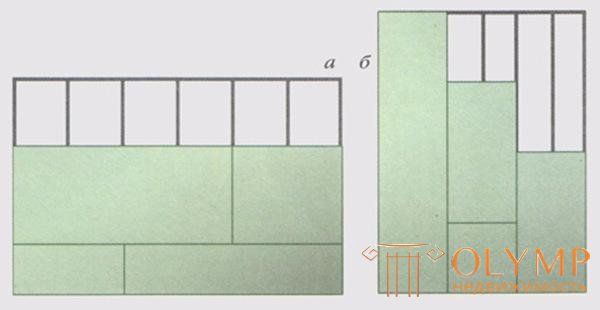
Two standard schemes of fastening the gypsum board to the frame of profiles
Sheets are fastened with self-tapping screws with a pitch of 15-20 cm. They should be used in all places where the gypsum board contacts the profile. Remember that sheets need to be installed so that they form as fewer straight lines at the joints. In other words, if the first row of the GCR was installed horizontally from left to right, then the second row should go from right to left. Similarly, if the first vertical row went from bottom to top, then the second row should go from top to bottom. With this installation of plasterboard will be able to reduce the load on the seams and profiles.
Already after installing the drywall get a flat wall. In the future, you will need to carefully putty everything and choose a topcoat. But the task of leveling the wall with a frame and drywall has already been completed.
Что бы оставить комментарий войдите
Комментарии (0)