
When repairing an apartment, the ceiling is always transformed. If it is not even enough or you need to make it beautiful, then you can use drywall. A box made of plasterboard on the ceiling acts not only as a decorative element. It helps to hide ventilation and wiring. It can also be used to create better lighting in the room.
Content:
Creating a box, and even on the ceiling requires additional skills. This is not as simple as sheeting a profile along a wall with drywall, but also not as difficult as creating a multi-level ceiling with shaped elements. Since we are talking about building a drywall ceiling box with your own hands, you must first learn about all the positive and negative aspects of creating such a structure. Let's start with the positives.
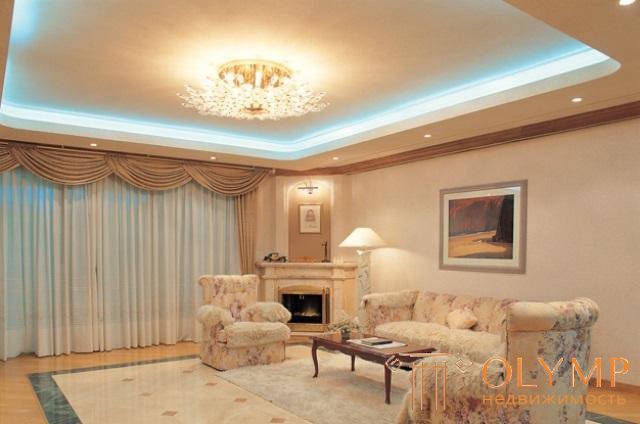
Backlit plasterboard ceiling box
There are several negative points that are worth paying attention to:
If the pros outweigh the cons, then you can get to work.
Works can be carried out independently
Without special tools and materials, installation of a plasterboard box on the ceiling will be impossible. Few people make such a box on a rough ceiling without using drywall. Therefore, for sure repairs with the use of drywall have already been carried out or only planned. In any case, all the necessary materials and tools should by this time be obtained. To create a box no extras come in handy.
As for the tools, we need:
Consumables will require drywall, metal profiles and screws.
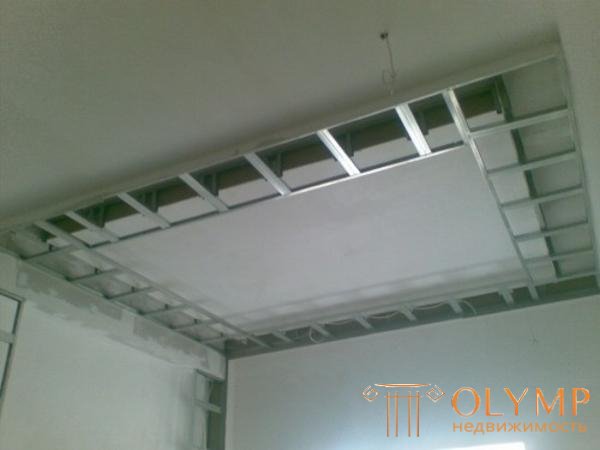
The frame of the box is assembled from metal profiles and guides.
Before you assemble the plasterboard box on the ceiling, you need to choose the correct plasterboard and guides. It is quite possible to use the same drywall that is used to level the ceiling. The thickness of the ceiling plasterboard is 9 mm, which is quite enough if heavy objects are not hung on the box, and they should not be there.
If the drywall ceiling is not enough, but remained walling, then you can use it. There are no critical moments in the choice of GCR. Nor does it matter how long the sheets will be. The only thing you need to pay attention to is the need to use moisture-resistant drywall if moisture is collected on the ceiling (for example, in the bathroom).
The entire structure can be assembled from guide profiles. You must additionally use carrier profiles (CW or CD) of the appropriate size. The whole frame can be assembled from guides, which will not affect its strength. However, it is difficult to do and it will be necessary to trim parts of the jumpers from such a profile so that they are securely fastened.
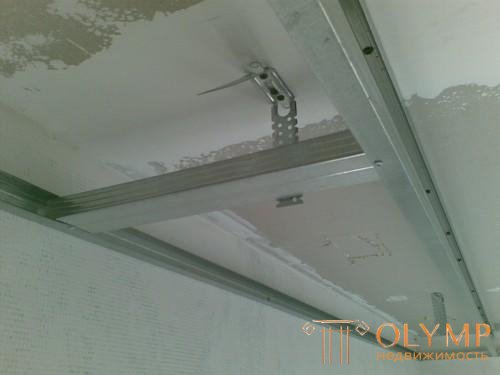
For greater reliability, you can use suspensions
Even if you make a box around the perimeter of the plasterboard ceiling, such a seemingly cumbersome design does not need to use rack-mount profiles for additional strength. Rather, they are used because they have the right size.
In this case, it is best to use the remnants of the material after the repair of the room, and if not enough, then buy the usual guides.
By constructing a simple structure, you can avoid using different connectors, crabs and hangers.
Before you make a box of plasterboard on the ceiling, you need to do some preparatory work. It is extremely difficult to construct the frame of the box at the same time as the ceiling frame. And it makes no sense to burden yourself with such a heavy process. Therefore, the walls and the ceiling should already be sheathed with drywall before assembling the box.
Before marking, you need to determine the size of the ceiling box. In accordance with these dimensions on the ceiling will need to retreat from the wall a certain distance. However, on the wall itself you will also need to retreat to the height of the box.
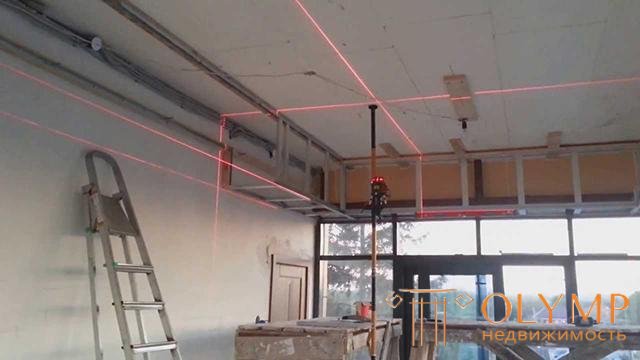
With laser level, markup is done very quickly.
Indents are made from the very edge of the surface where the marks are put. These tags are connected using a jingle cord or a profile playing the role of a ruler. A plasterboard box on the ceiling will be assembled along these lines. In fact, the line on the ceiling indicates how wide the structure will be, and the line on the wall will be its height.
At the stage of creating a ceiling of gypsum plasterboard, it is possible to lay the profile at such a distance from the wall, so that in the end the box is attached not only to the drywall, but also to this profile.
To simplify the work, some prefer to lay out profiles for the frame on the floor, and then transfer everything to the ceiling.
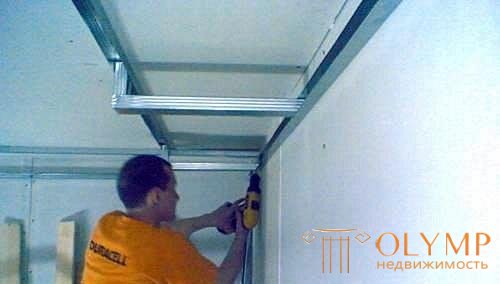
To begin, consider the option of collecting the simplest possible frames of the box, which will be adjacent to the ceiling and wall. First, the guide profile is attached to the ceiling along the intended line. It can be fixed to drywall with ordinary 35 mm long screws.
If the guide runs parallel to the ceiling profiles, then it is desirable that they coincide in place. Then the screws will go through two profiles. If the duct from the gypsum board on the ceiling is made perpendicular to the ceiling profiles, then there will still be several points where you can walk through two profiles with a self-tapping screw for more reliable fixation of the whole structure. It is for this reason that the frame can be safely fixed with conventional screws, even without using suspensions.
A guide along the marked line is also attached to the wall. It is likewise desirable to fix it in such a way that in several places the screw gets onto the profile of the rack under the drywall. On the adjacent walls, two more profiles are attached at right angles to each other and to the guides from which they extend.
Jumpers connect at a right angle, back to the outside
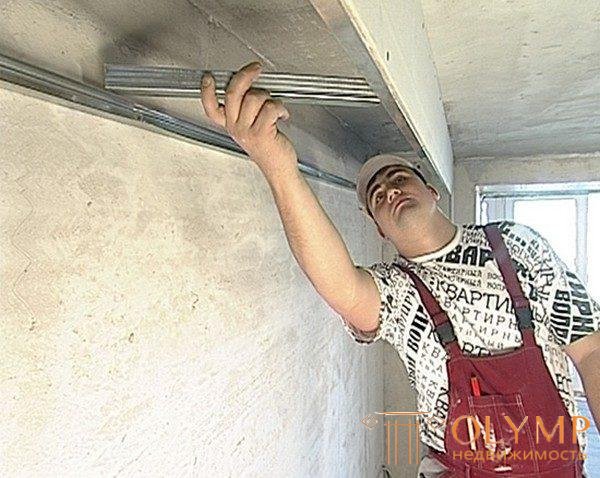
We cut small lintels along the height of the box and insert them into the profile on the ceiling. Some must be the same height and stand straight. Fastening is carried out with the help of small metal screws. The jumpers are installed in increments of 30-60 cm. They must stand with their backs out.
Another jumpers are inserted into the profile on the wall and simultaneously connected to the jumpers hanging from the ceiling. Profiles fasten among themselves by self-tapping screws for reliability. If you use guides 50x50 mm, then everything will come out perfectly and the jumpers will fit tightly into each other.
Instead of jumpers from the wall and from the ceiling, you can use one jumper, which is cut so as to bend in the right place. As a result, two separate jumpers will be replaced by one piece. So it takes less screws and time to work, but you can easily miscalculate and trim the profile in the wrong place.
The frame is ready, but there are other ways to make a ceiling box out of drywall.
This method is suitable for those who do not want to mess with the jumpers, and is looking for more simple ways to solve the problem. The assembly of the frame by this method is carried out in the same way as described above, but only until the installation of jumpers.
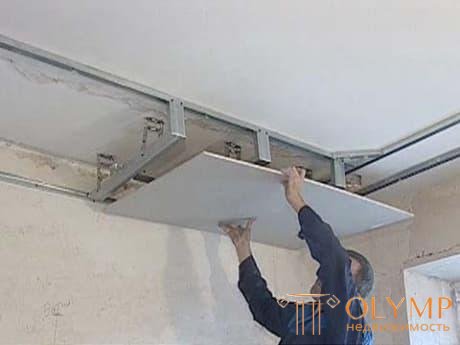
After attaching the guide to the drywall install horizontal lintels
Instead of placing jumpers, it is necessary to fasten to the guide on the ceiling a piece of plasterboard that will become the front part of the box. A piece of plasterboard should be taken with a reserve, then to cut off in height. It is screwed to the top profile and to what is installed on the wall adjacent to the side. You may need to use a few pieces of drywall.
Now to the drywall from the inside is mounted a guide parallel to the fact that it is already installed on the wall and ceiling. It is clamped by screws, which are screwed into the plasterboard from the front side. Thus, the guide and the drywall itself are simultaneously attached. Further it will be necessary only to drive the horizontal lintels in the lower part of the box to make the structure more rigid.
How to make a box of gypsum ceiling on the ceiling in this scheme can be found in the video.
There is nothing difficult in plasterboard upholstered plasterboard. Common truths do not change:
Before finishing and before plasterboard plastering, wiring should be done if a ceiling box made of plasterboard with illumination was assembled. You may also need to drill GKL under the lamps. All those parts that will be puttied in the future should be processed with a knife so that there is no burrs. The same applies to the joints of the sheets.
There will be at least one corner in the box, which also needs finishing. To do this, you will need to purchase a reinforcing corner, which is attached to the outer corner of the box. It can be fixed with a construction stapler or put on a putty. The latter option is resorted to most often. It is necessary to put a small layer of putty on the corner of the box, and then press the reinforcement corner and hold it for a while. He will stick himself, and will not fall away.

Reinforcement corner will help protect the outer corners of the box
Finishing plastering of the drywall duct on the ceiling is carried out in the same way as any other drywall construction.
There are several options for creating a box on the ceiling, and everyone chooses the one that suits him best. Someone is hiding the hood in the box, but someone needs it to accommodate the LED backlight. Some attach the box to the ceiling of plasterboard, while others will install a suspended ceiling. Someone wants to make a box on one side of the ceiling directly under the wall, and someone wants to put it around the perimeter of the room with a small indentation from the walls. So everything is individual and depends on specific situations.
Что бы оставить комментарий войдите
Комментарии (0)