 When planning repairs in the most necessary and multi-functional room, did you ever think what could most spoil the look of any bathroom? This is not about scattered towels and other confusion, and not even about its proper design.
Sewer and water pipes passing through the walls are covered with moisture, darken, plus the unpleasant noise of flowing water or excess pressure in the pipes.
The days when bathroom repairs were limited to painting walls and bath cabinets are long gone. I want to give the room for hygiene some style and protruding tubes with this style can not be combined.
We will not reinvent the wheel; there are several proven ways to hide pipes in the bathroom.
Content
 Installing pipes into the wall is an ideal way to seal pipes in a bathroom; this method is especially good for a new bathroom.
First, let's determine what layout we need. Usually in the bathroom there are three water inlet and outlet points:
Estimated pipe exits should be marked on the wall.
With water, everything is simple, and when installing the sewage system it is necessary to take into account that the pipes are inclined towards the riser in the toilet.
The bottom of the sink is the bathroom, the pipes from the sink and the washing machine are adjacent to the sink in the bathroom. The most remote point is a washing machine.
Before mortaring pipes in a wall, it is necessary to figure out for which types of pipes and their connections such a method can be used. If there is a possibility, it is better to replace cast iron pipes with metal-plastic ones.
Hiding in the walls:
In the walls do not hide:
Water finds its way into the weakest connections. And if it is difficult not to notice a clear threat, the fitting that is closed in the screed under the tile will first “warn” the neighbors about repairing their bath at your expense. Yes, and to eliminate the accident in oneself is the same as organizing a new bathroom repair.
It is necessary to pay attention to:
The installation of pipes in the wall involves a curtain. This option is not suitable for:
On the walls of non-capital communications can be laid in the grooves (grooves), and on the floor - in the screed. The warranty period is 50 years, especially since today's pipes do not sweat or rust. The groove can be sawed by a grinder or chiselled.
When a wall is made of plasterboard, wiring is done prior to installation of the panels. Cutting holes if necessary will not be difficult. When wiring, consider the thickness of the tile or sheet.
Next, the pipes must be replaced and shifted with insulating material. Foam and heat insulation dampens thermal expansion of pipes.
The next stage is plastering pipes. Now you can revet.
When the place behind the bathroom is not reveted, the pipes from the washing machine can be in the wall and not hidden, but fastened to the wall with clamps. The holes for the pipes must be taken into account precisely and adjusted so that there are no large gaps, and the mixer covers them. Facing the bath, access to the siphon close the hatch.
Example task
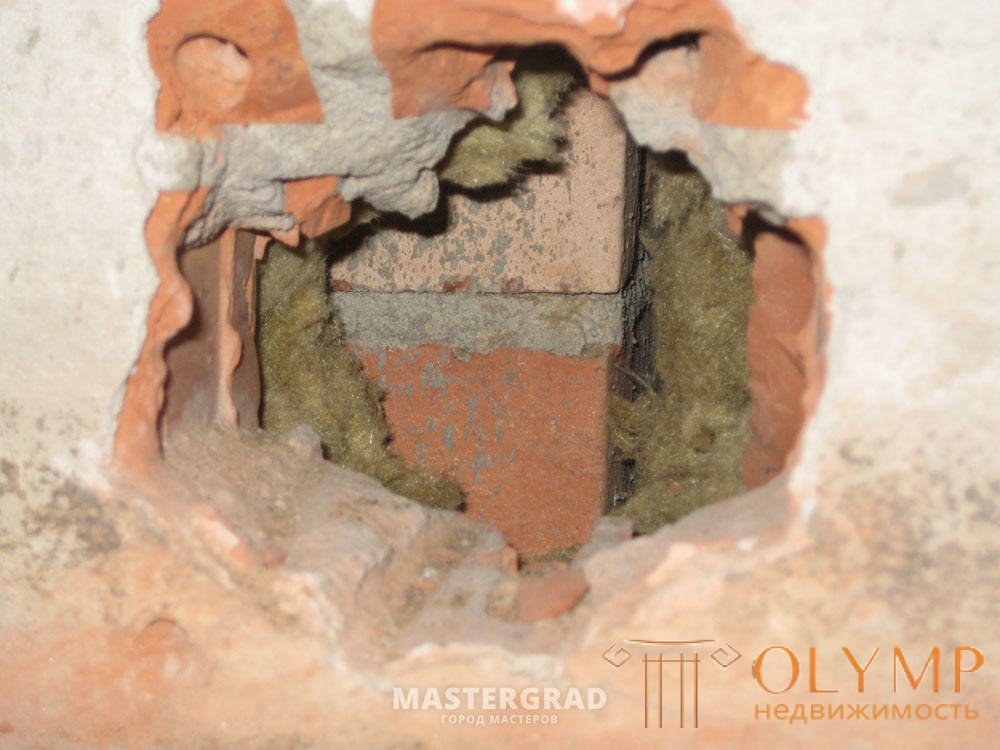
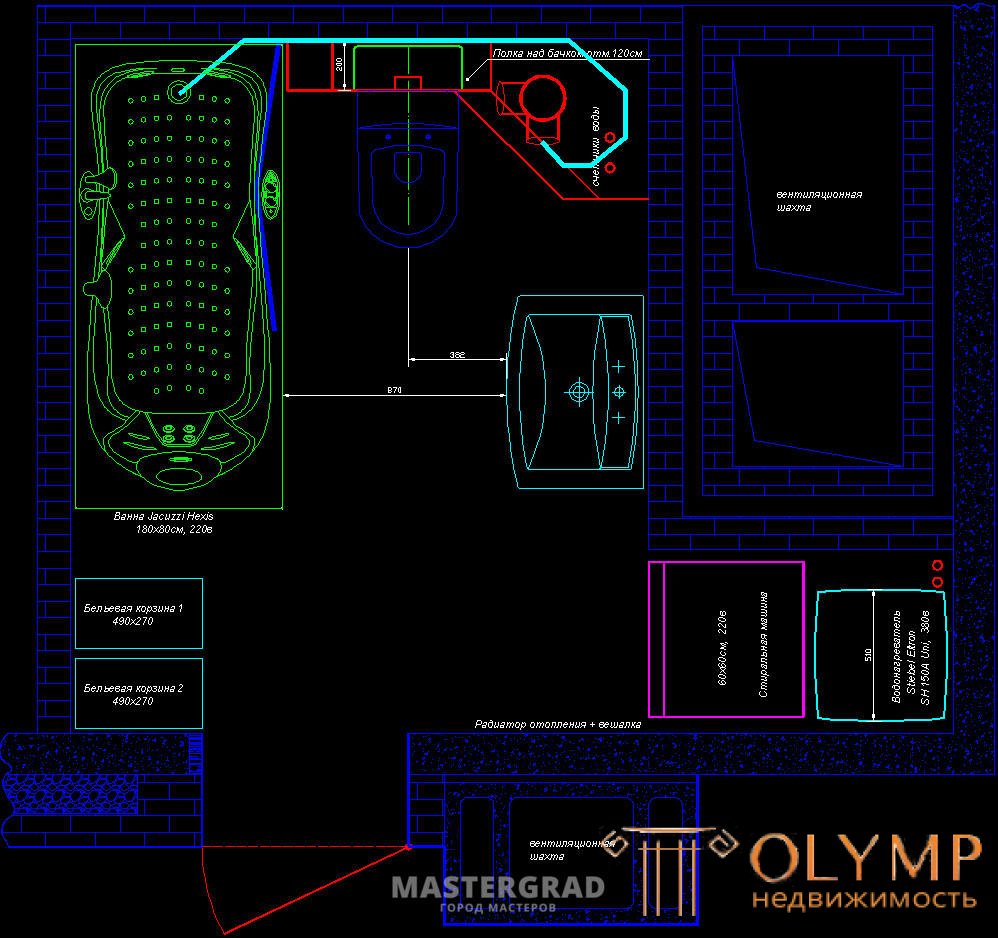
In the bathroom walls are folded in half-brick, hollow . Moreover, one of the walls is around a large ventilation chamber: a ventilation chamber is also half a brick, then a 8 cm gap with a mineral wool, then again a wall (internal, visible) into a half brick halfway — see drawing, right behind the sink. In the wall at the ventilation chamber or in the specified clearance of 8 cm and I would like to remove the pipes:
- overflow from the sink (about 1 meter long) - to the riser (red circle in the upper right corner, in the box)
- copper pipes for connecting the mixer
-pipe washing machine
- pipe liner to the washing machine.
Questions:
1) Is it possible to horizontalize a wall with half a brick almost horizontally without losing stability? For example, the length of the gate is 1m, the slope from the shell is 30 degrees, the depth is 40mm. On the same wall - sink, the load is significant, especially if you lean
2) is there not enough for the sink drain pipe 32mm - to less strobe
3) Is it necessary to drain the SM through the siphon of the sink, or is it just enough to “loop” to the floor at its hose (a la siphon)?
4) I find it easier to solder the sink drain from the remains of a 42mm copper pipe and put it into the 8cm gap between the vent wall and the false wall. Is it acceptable to use copper to drain? It will not rot - it will work in semi-dry mode ... and even - alkali from the CM - if I connect the CM to the sink siphon. 
5) Is it possible to remove the drain pipe SM in the screed? Those. to put on the floor, and then up at the riser? I can also copper, say (what diameter do I need?) Or PP

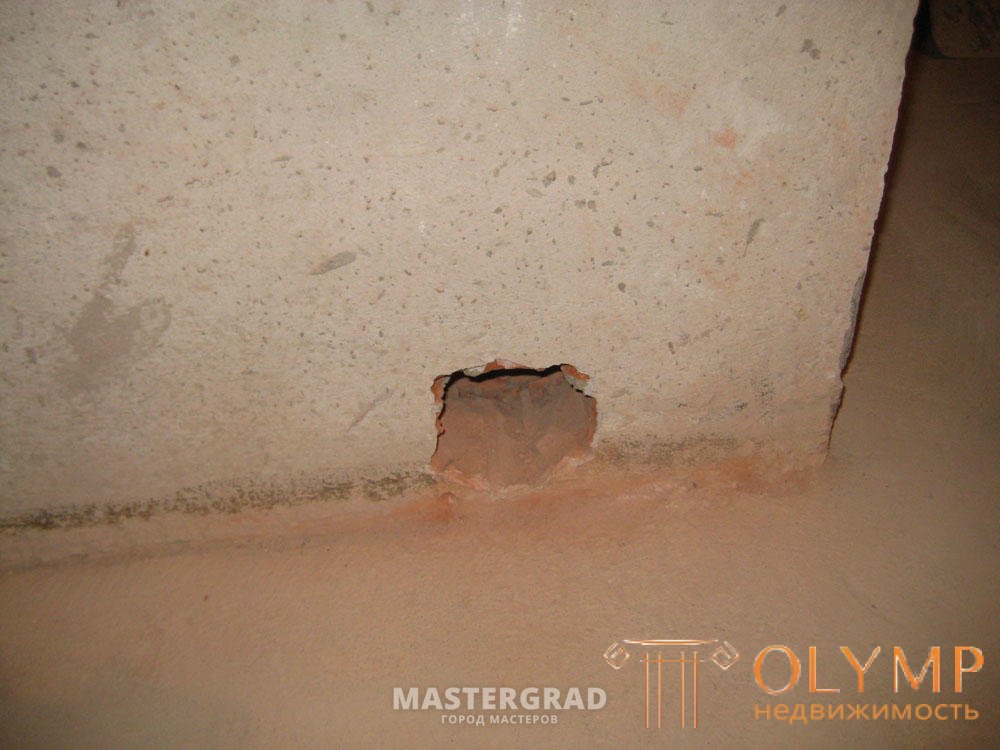
Answer Options
1. You can
2 basically enough. but the water will be recruited a little in a scoop. the so-called backwater ....
It’s enough if a long-haired witch is no more than one living there.
3 you can put your siphon on cm ... but you can also loop ...
4 It is difficult to make a tight transition to a 32 mm siphon tube.
If it's simpler, just do it, just don't wall up. Or foam, or energoflex.
5 it is possible to remove the standard hose in the corrugation, pre-replacing ... such a theoretical ... thought ...

With a non-standard bathroom area, you can make some redevelopment and hide the pipes for drywall. Under the low podium for the bath you can hide all the wiring.
How to close the pipes in the bathroom plasterboard?
Pipe boxes in the bathroom are sheathed with moisture-resistant drywall or plastic panels. For the frame, you can take wooden bars 30 × 40, treated with impregnation 2 times or a metal profile and fix with screws. Outside, the frame is closed with drywall with a door or panel for approaches to the riser and valves.
For access to cranes - inspection hatches, usually bought 200 × 300 - the width of the tile; to the filter system - two 600 × 600 hatches.
The box can be painted, pasted over with a film or tile.
A more solid option would be facing the closed pipes with tiles. To do this, prepare the base in the form of two frames of thin wooden slats. The length of the first frame is equal to the length of the section to be closed, and the width is the width of the tile.
For the second frame, the length is the same, the width is reduced by the thickness of the rail.
With each other, the frames are connected by lateral sides. The resulting structure is sheathed with plywood or other lightweight material. From above lay a grid - the basis under a tile.
Behind the pipes it is necessary to fix the supporting bars: measure the desired length and wedge it between the pipes and the wall. On the pipes we dress the made casing.
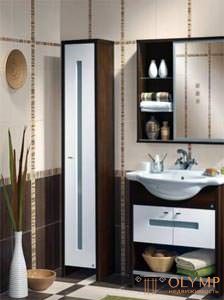 How to decorate or disguise the pipes in the bathroom?
Another idea how to hide the sewer pipes in the bathroom will be prompted in furniture stores where bathroom sets are sold. In modern stylish lockers and nightstands, it is enough to cut holes to hide the laid pipes.
But where the pipes are always high humidity, this is an additional condition when buying a headset. It is possible to treat the edges of the holes with moisture-proof materials or provide the bathroom with additional ventilation and microclimate control.
The hygienic organization of bathroom space requires a special approach. Installation methods can be combined, but you can not lay pipes where they can get screws!
All the tracks before the start of the finishing need to be transferred to paper with an indication of the size, or at least take a picture so that in future there will not be a nail under the hanger.
Beauty is important, but engineering communications allow hidden installation only when you are confident in its quality.
Read the article on how to grind brick rd bricks. after ukadyata takoryada there you can lay a pipe
To the top
How to choose a quarter in the window opening
A door or window opening in a wooden frame wall with facing in the form of a wall in a half-brick makes a different way than in a solid wall. Since the wall consists of two independent walls, you will have to make two holes, one from the outside, the other from the inside, using a different technique. First make an external opening. The outer wall, called lining, is made of half-brick laying and has a protective function. This design is not a carrier, so you can do without temporary supports. However, before knocking out the opening, it is necessary to insert a steel corner at the top of the opening like a lintel so that it can withstand the weight of the overlying bricks.
First mark the position of the opening on the wall and try to ensure that the borders of the opening coincide with the strips of cement in the masonry. Make notches only on horizontal connections of the solution on the sides of the marked opening. Carefully remove entire bricks from the opening cavity. The vertical edges of the opening are then jagged, due to the masonry ligation. The irregularities of the vertical sides of the opening must be laid with pieces of bricks using the material of the disassembled wall. In order to cut off a piece of brick exactly, it is necessary to make a notch on it with a chisel, then put it on the sand and hit the line strongly with a chisel. Brick exactly fall apart into two parts along the intended line. The internal bearing wall is pierced using temporary, height-adjustable metal supports, until vertical bars are inserted. Later, the opening will be supported by a box of thick bars, built into the opening. After you have made the opening in the inner wall, insert the door frame or window block into it. A box or block consists of an upper transverse crossbar and shoals that can withstand the load. From the shoals, the load from the transverse upper crossbar is transmitted to the lower transverse crossbar. The window box or door as much as possible must be tied to the size of the wall frame pitch. It is desirable to combine the functions of the vertical racks of the frame, reinforcing them with the window or door joints, and to combine the horizontal links of the frame with the function of the upper and lower crossbar of the window box. The upper crossbar of the window or door box will also perform the functions of the carrier lintel, so its section should help you to choose a professional builder. If you are making a doorway, both openings should be at floor level. When you insert a new window, make a rigid frame in the inner wall to support the window board. In the outer wall, you can install a concrete or brick window sill, which will help to divert rainwater.
The opening in the brick shield
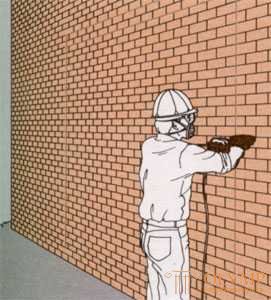
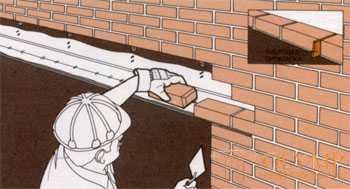
1. How to cut the outline of the doorway. Wear safety goggles and a face mask. Take an angular sharpener, insert into it a mill for working on a stone and make horizontal saws on the horizontal strips of cement holding the bricks together. Cut the saws up to the first vertical strips of cement that are outside the contour of the opening. Cut the lower border of the opening in a horizontal cement strip. The upper border of the opening is also cut along the horizontal bar. Additionally, another one is made with two bricks above the border of the opening in order to outline the cavity of the lintel. Work slowly in order not to overheat the mill.
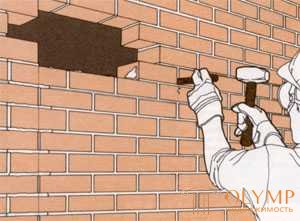
2. How to choose a cavity for the jumper. In the upper corner of the marked opening, knock out the horizontal and vertical layers of cement holding the bricks with a hammer, chisel or bolt. In each of the layers that make up the cavity of the beam, select two or three bricks. Immediately remove three more bricks from the top layer of the opening. Try to choose bricks whole. They may come in handy when you lay the cavity above the beam.
3. How to fix the bracket, temporarily supporting the wall above the future jumper. Screw the 50-mm corner bracket onto each rack behind the exposed wall. Use 50mm stainless steel screws. Shelf bracket should be exactly under the masonry bricks, supporting them. Remove the remaining bricks from the three layers of masonry.
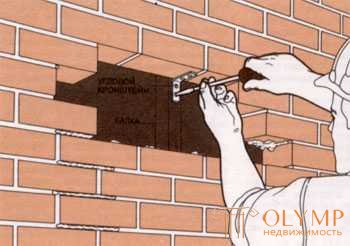
4. The final sample cavity for the jumper. Remove the bottom layer of bricks from the cavity for the lintel, then disassemble another 200 mm of brickwork on each side of the opening to be able to support the lintel.
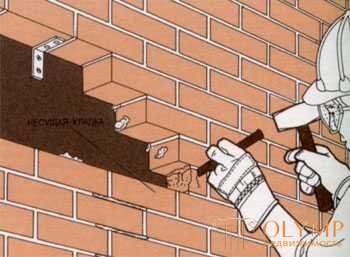
5. The final sample of the opening. Using a hammer and chisel, remove the bulk of the bricks from the opening. Closer to the edges of the opening, remove the bricks one by one, so that the edge of the wall has a jagged shape. Carefully chop a piece of bricks to fill the teeth on one side of the opening. Add 9 mm to the width of the door frame or window block and repeat the procedure on the other side to get an opening of the desired width.
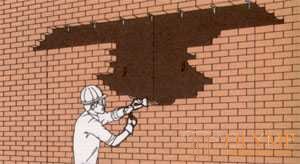
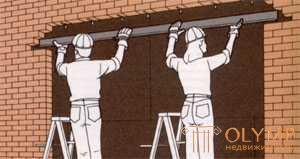
6. How to set the jumper. Apply a layer of mortar 15 mm thick on the supporting surfaces. Together with the assistant put the jumper in the right place. Check the position of the jumper level. If necessary, using a hammer, drown one of the sides of the jumper into the solution, making it horizontal.
7. How to seal the cavity. Using a pistol, fasten a piece of strip of waterproof plastic gasket on the brick wall between the beam and the brackets. Cover the beam with a waterproof gasket, cut off the excess, leaving a free edge of the beam 10 mm wide. Put a thin layer of mortar on a waterproof gasket and then a layer of bricks. In every third joint between bricks it is necessary to lay a fiber spacer 9 mm thick and 100 mm long instead of mortar. When the mortar sets, remove the fiber seals so that holes remain to remove moisture. Bricks to lay the remaining layers of masonry.
Aperture for a door in the wall with support posts
1. How to remove racks. Start working indoors. Drill a wall in the corners to mark the opening on the inside wall. Then, working indoors, remove the plinth and dry plaster from the vertical posts. Cut the plaster from the racks closest to the edge of the opening. Remove insulation and porous gasket from gaps between racks. Install adjustable feet to support ceiling weight. Make two kerfs in the middle of each rack at a distance of 25 mm from each other. Knock out the resulting 25-mm pieces from the racks and complete the work with chisels. Remove the rack with a wag. Using pliers, remove the nails that stick out from the top and bottom crossbeams.
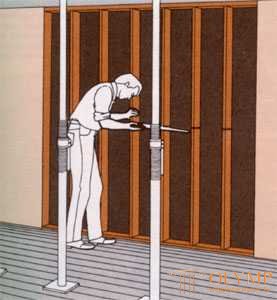
2. How to mark the door frame or window unit. Measure the distance between the side posts of the finished door and add 25 mm or as much as the manufacturer indicated to insert the wedge. On the lower crossbeam, apply the resulting size so that the door is in the middle of the opening. Mark on the lower crossbar the position of the two pillars of the door frame and two pairs of jambs on each side.
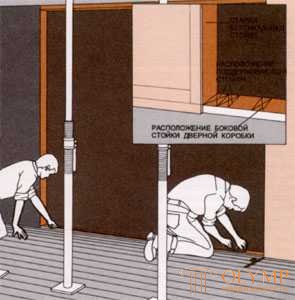
3. How to install additional racks. Measure the height of the door frame, add 10 mm or the distance specified by the manufacturer. Mark this total height at the edges of the future opening on the old posts from the floor level. Cut four additional racks with a section of 100 by 50 mm. Nail additional racks to the vertical racks of the frame and to each other with 100 mm nails with an interval of 300 mm.
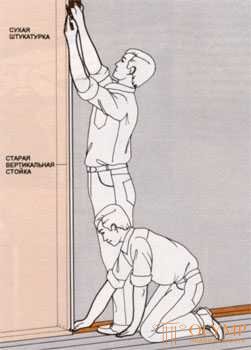
4. How to install the upper crossmember. Make the upper crossmember in the size of the opening, knocking together two boards 225 by 50 mm. Along with the assistant, position the upper crossmember so that it lies on the additional racks. Nail the top cross member to the sub and vertical posts. Restore the wall trim with dry plaster from the place of its removal during disassembly to the edge of the opening.
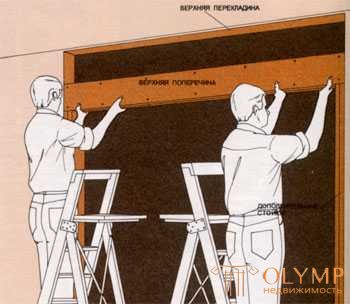
Completion of the window opening
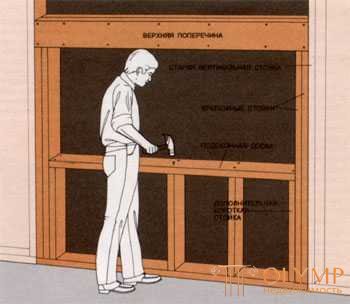
How to install an internal hard windowsill. Cut the vertical supports from the floor to the window opening and remove only the upper sections of the vertical supports. Install the mounting studs and the upper crossmember. Measure on each pair of mounting posts the height of the window unit, adding 60 mm. These marks serve as a guide when drawing chalk lines on interfacing racks. You can now cut off the insert stands with a band saw. Nail in extra short racks to each inner mounting pole between the bottom rail and the mark for the inside hard sill. Cut a board of 100 by 50 mm in size so that it stands between the mounting posts and nail it to the short posts. Now for the window unit, cut two side racks with a length corresponding to the distance between the upper cross member and the rigid sill. Mark the width of the window on the window sill and nail the side racks of the window unit to the window sill and the upper crossbar. Finally, cut the trim, and the upper crossbar, sill and side racks can serve as guides for the saw.
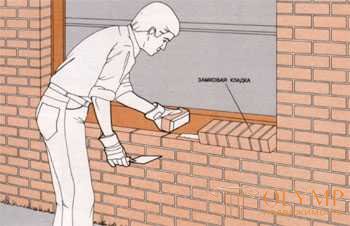
How to make window sill. Try to align the lower edge of the window opening with other windows in the house. If on the other windows a row of bricks on the lower edge of the opening lies on its side, - this is called the castle masonry, - put the same row on the new opening, leaving a 10-mm clearance behind the brickwork, that is, between it and the inner wall structure. The back of the cushion from the solution must be placed 10 mm thicker than the front, so that the bricks lay obliquely. Then rainwater will drain from the windowsill. To the top edge of the bricks lay level with the inner sill board, try to adjust the thickness of the solution pad. Between the bricks in one layer of masonry, it is also necessary to calculate the thickness of the mortar layer in order to complete the row with a whole brick. Warning: the mortar must fill the joints between the bricks completely, so that moisture cannot accumulate in them. In ordinary brickwork, the bricks are laid along the length of a narrow long edge to the outside. If the window sills of window openings in your house are finished in this way, then the new window sill should be finished the same way. The thickness of the mortar layer between the layers of masonry must be calculated so that the bricks go flush with the level of the sill board. You can buy a concrete window sill, the surface of which is made "under the brick". If the other window sills in your house are ready-made concrete, then order a suitable one 120 mm wider than the window opening. Window sill can be done by yourself.
Что бы оставить комментарий войдите
Комментарии (0)